Problem #1: Orange peel.
Before installing solar panels on the van, I painted and cleaned the rest of the van’s rusty roof.
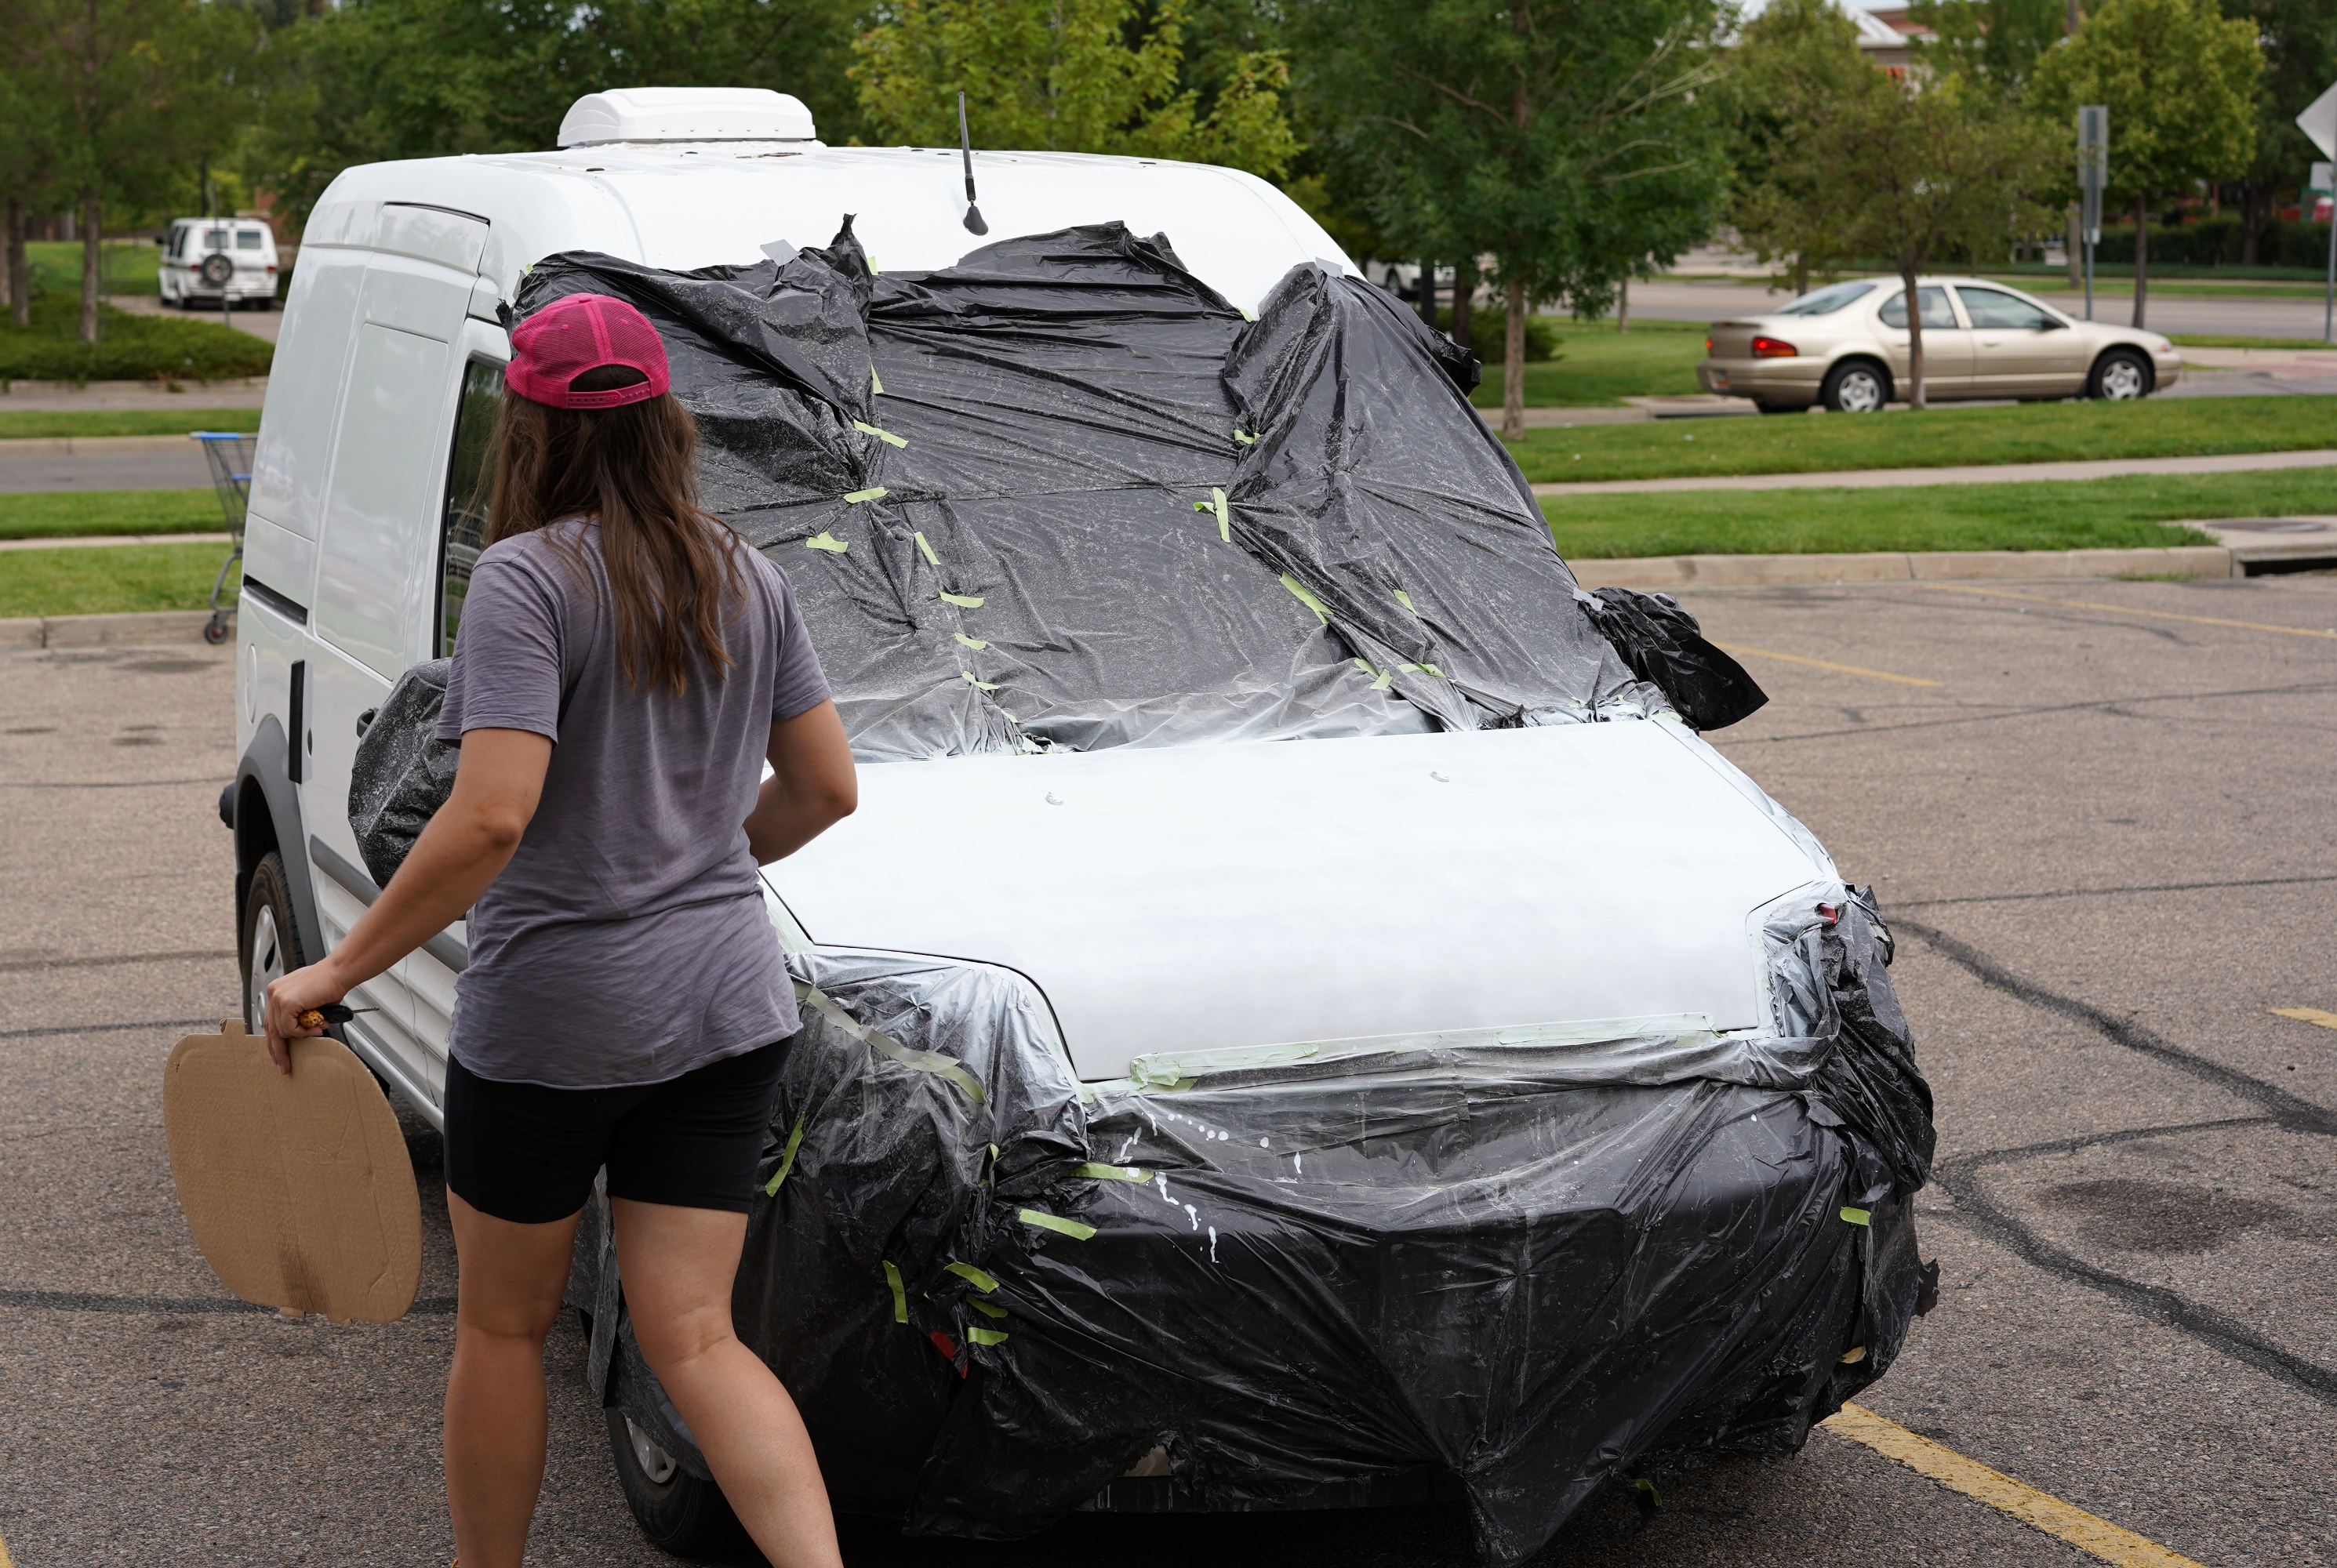
Spray painting a car is nothing like spray painting a piece of furniture, which was the extent of my painting experience before I began this project. Car paint is finicky. Apply it in direct sun, or in a gentle breeze, or at a slight angle to the car’s surface, and the paint dries to the texture of an orange peel. The bumps of the orange-peel-like surface trap dirt. They also refract light in weird ways, making my white paint appear grey from certain angles.

How can I make this sad paint job better? I’ve decided that hiring a professional painter is out of the question; the roof alone would cost $300. Buying a paint gun with necessary accessories doesn’t make financial sense either. I could try painting the car again with the same spray-can method I used last time, except this time with improved technique. But investing even more time into this small part of the van build is probably a bad idea. Winter is coming. I’ve already spent a full day painting the roof, and another three days sanding, priming, painting, and top-coating the hood.
How do I make it better? Sometimes that’s absolutely the right question to ask (e.g., How can I make the current political situation any better? Would fantasizing about sentencing Kavanaugh to a lifetime of high-stakes automotive spray-can painting make it momentarily better for me?). But when it comes to my little van’s paint job, I think the better question is, how do I stop obsessing about making it better? The purpose of repainting the roof and hood was to cover existing rust, and to prevent more rust from forming. My paint job did that. From certain angles, the paint actually looks good— a warm-hued white, like the inside of a coconut. From other angles, the paint looks inarguably bad. Can I accept this imperfection and move on?
Problem #2: My caulk gun is too short.
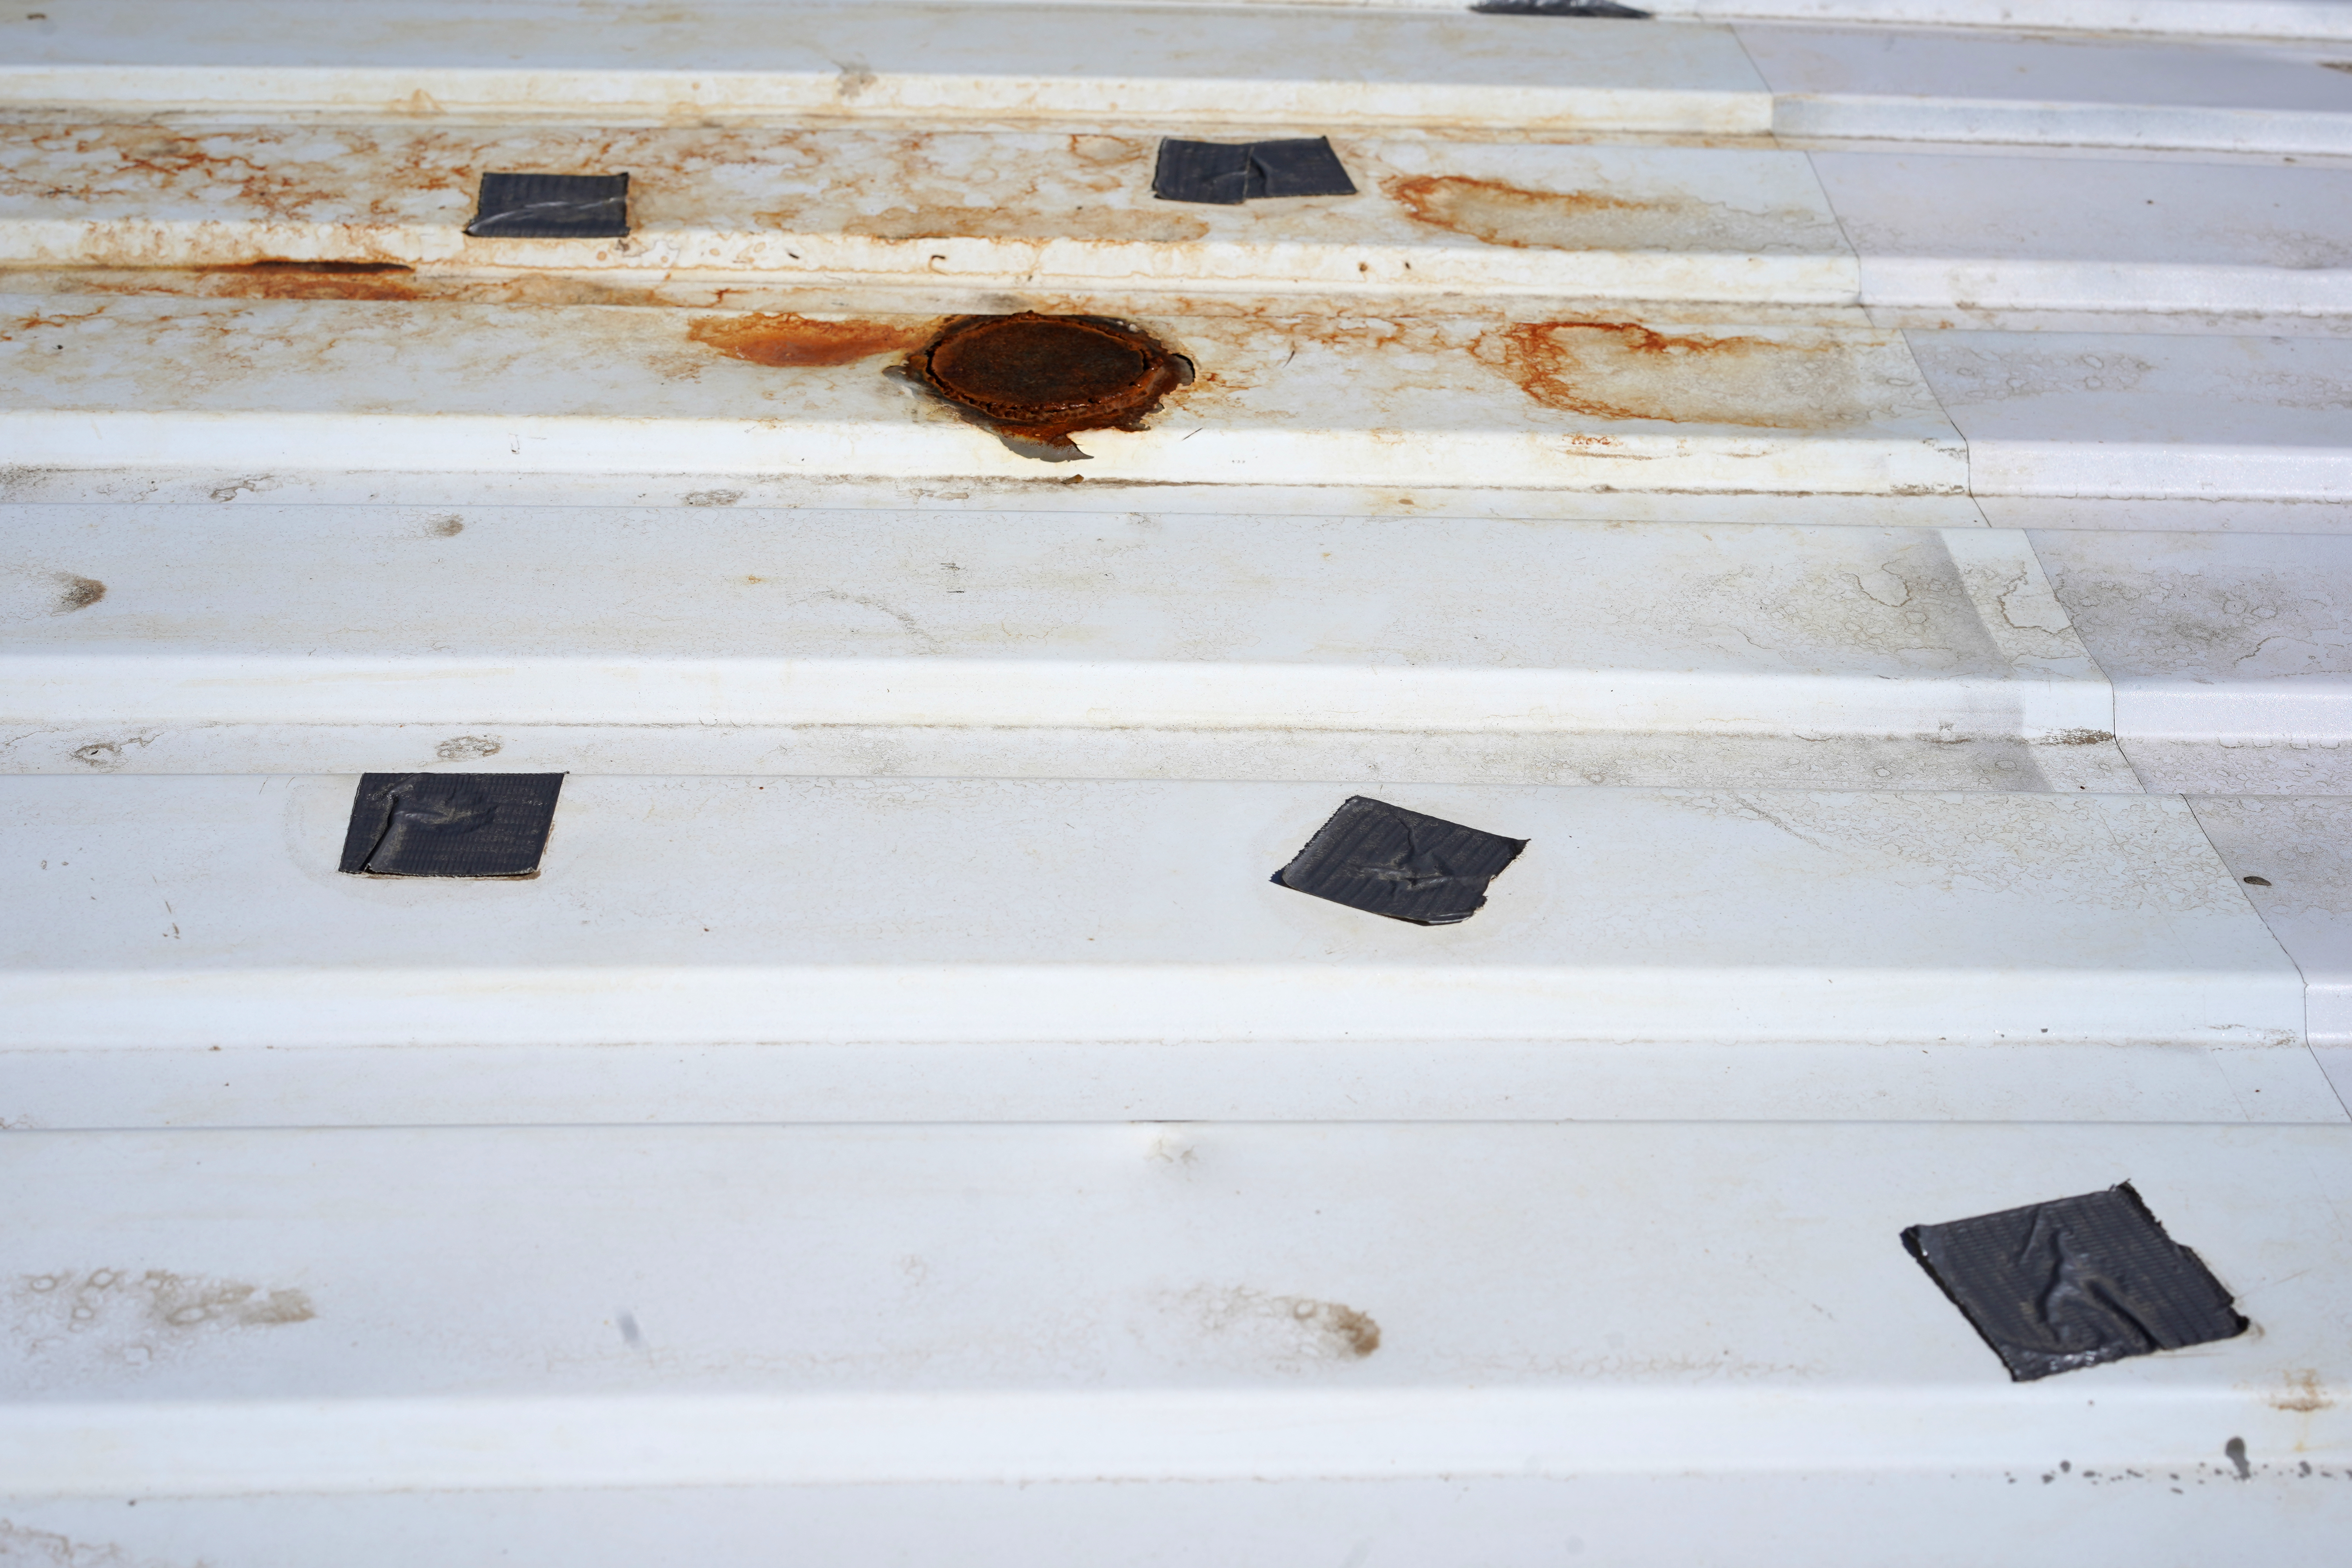
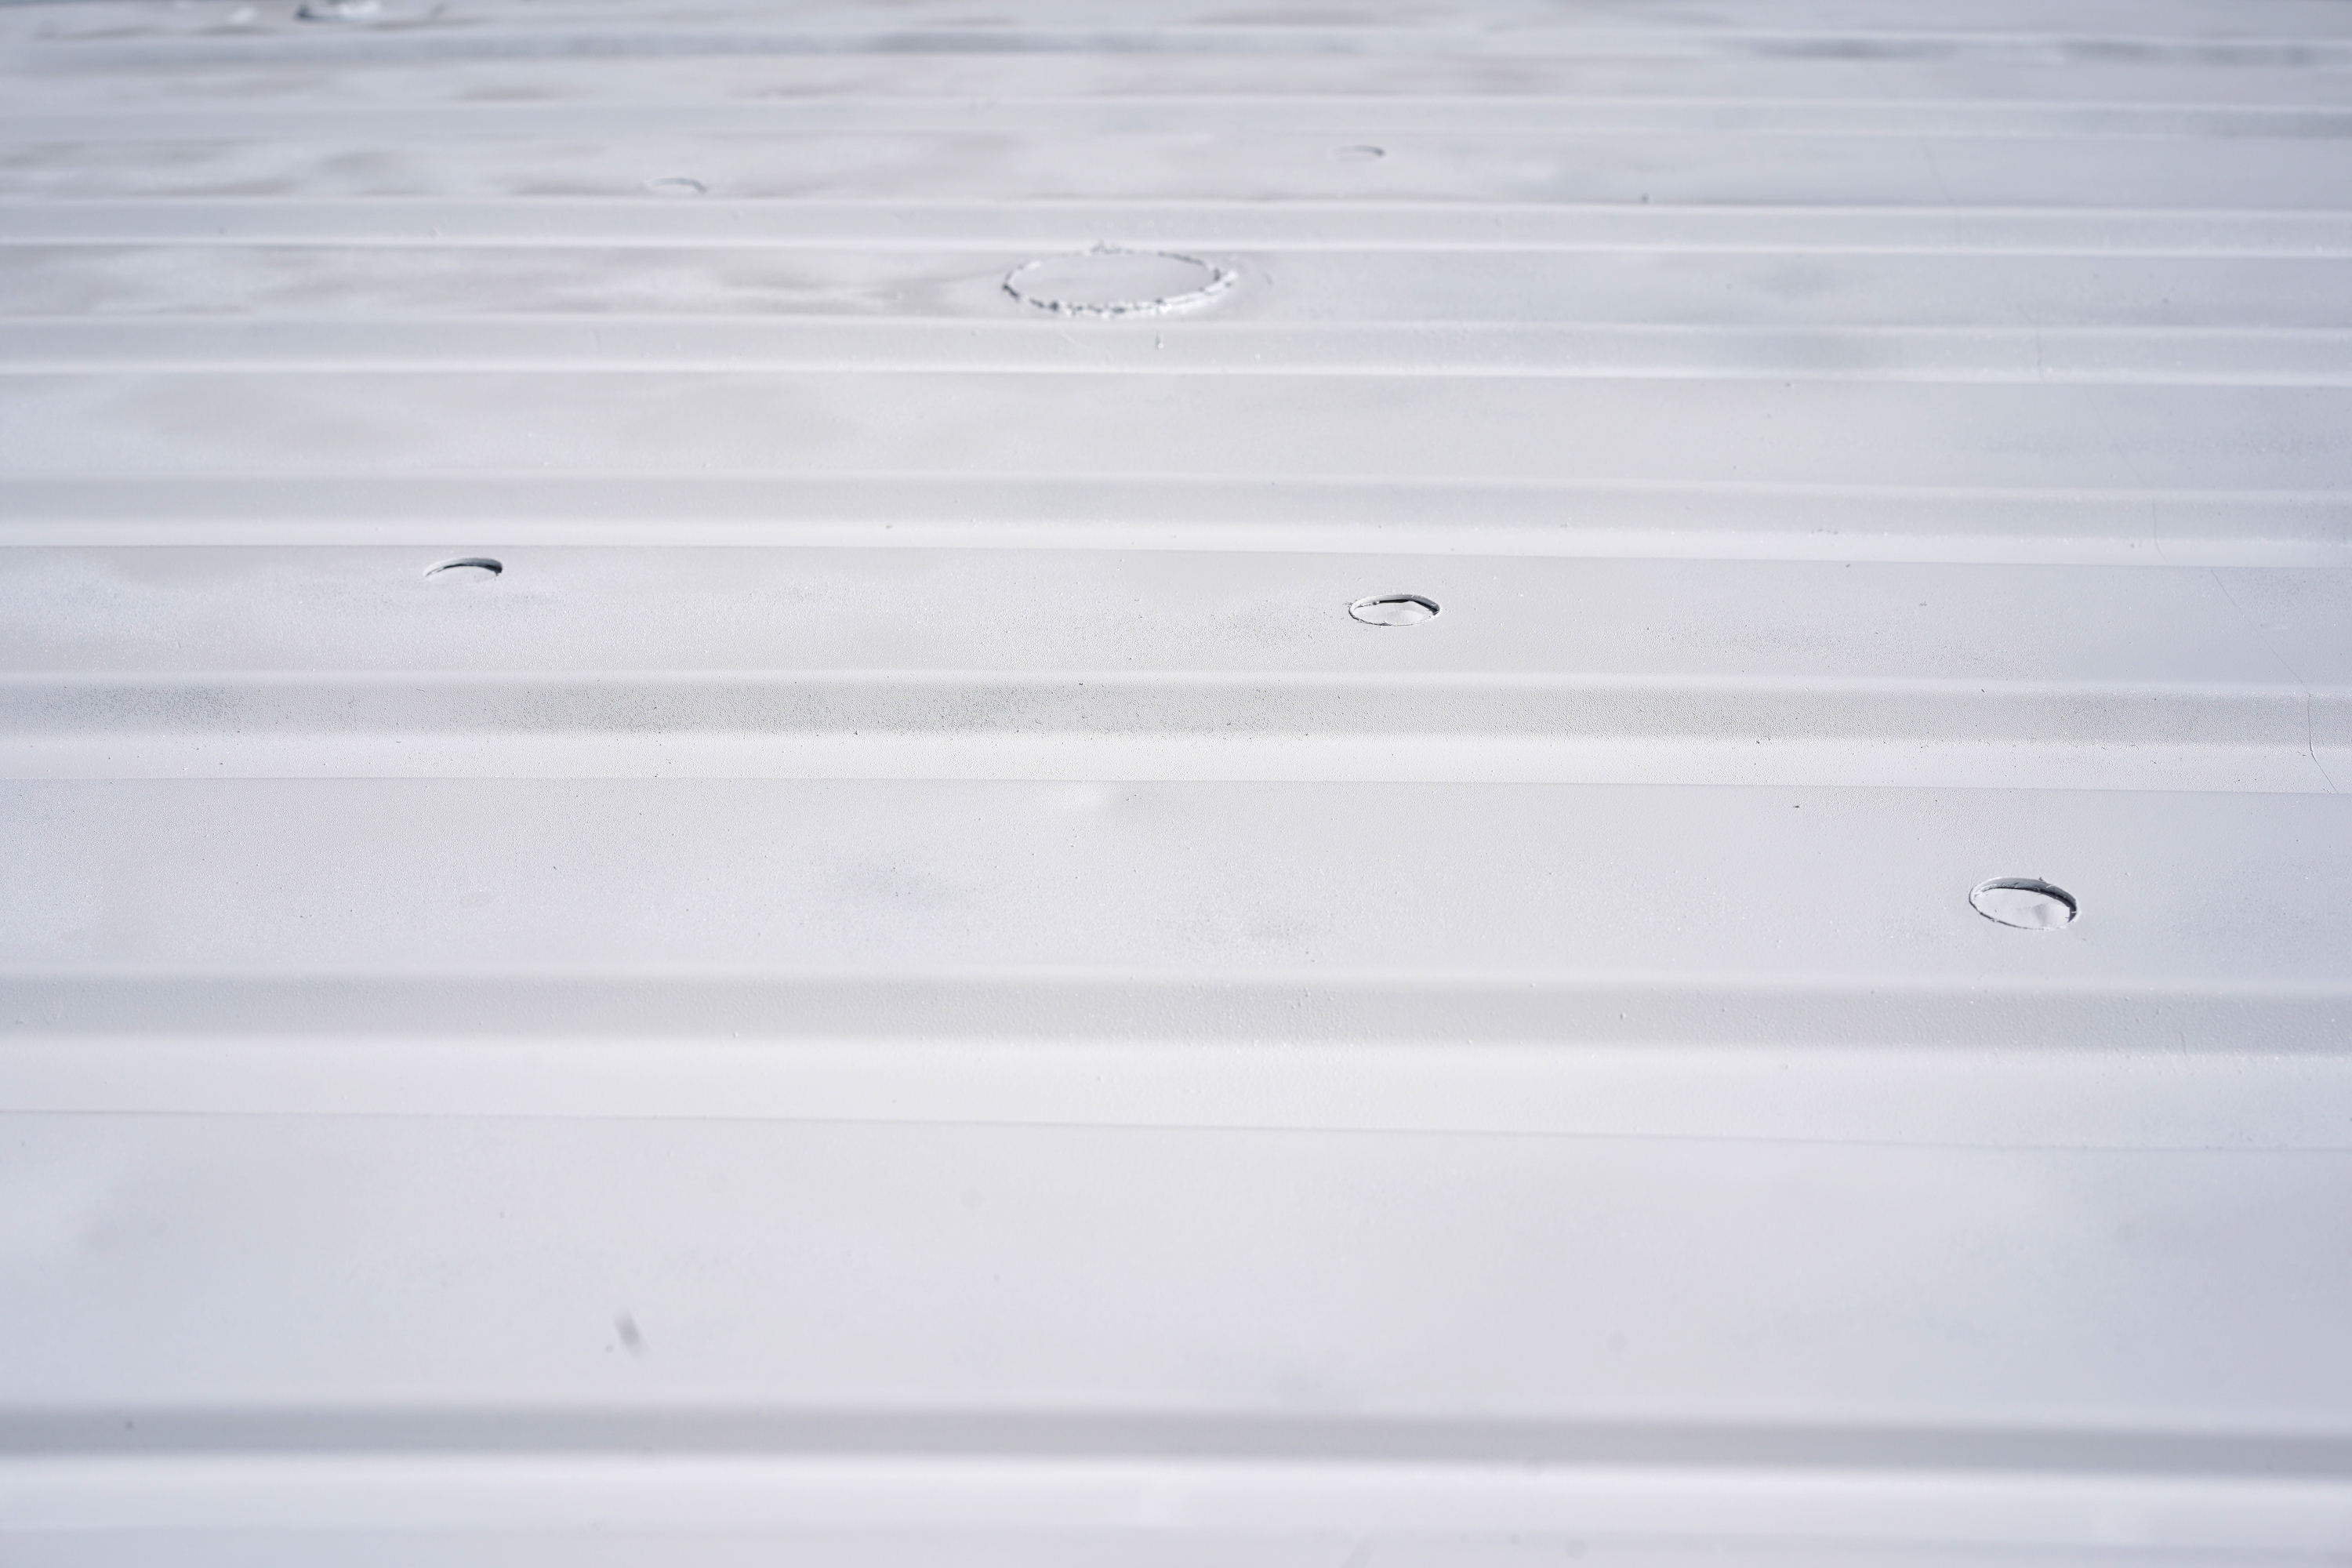
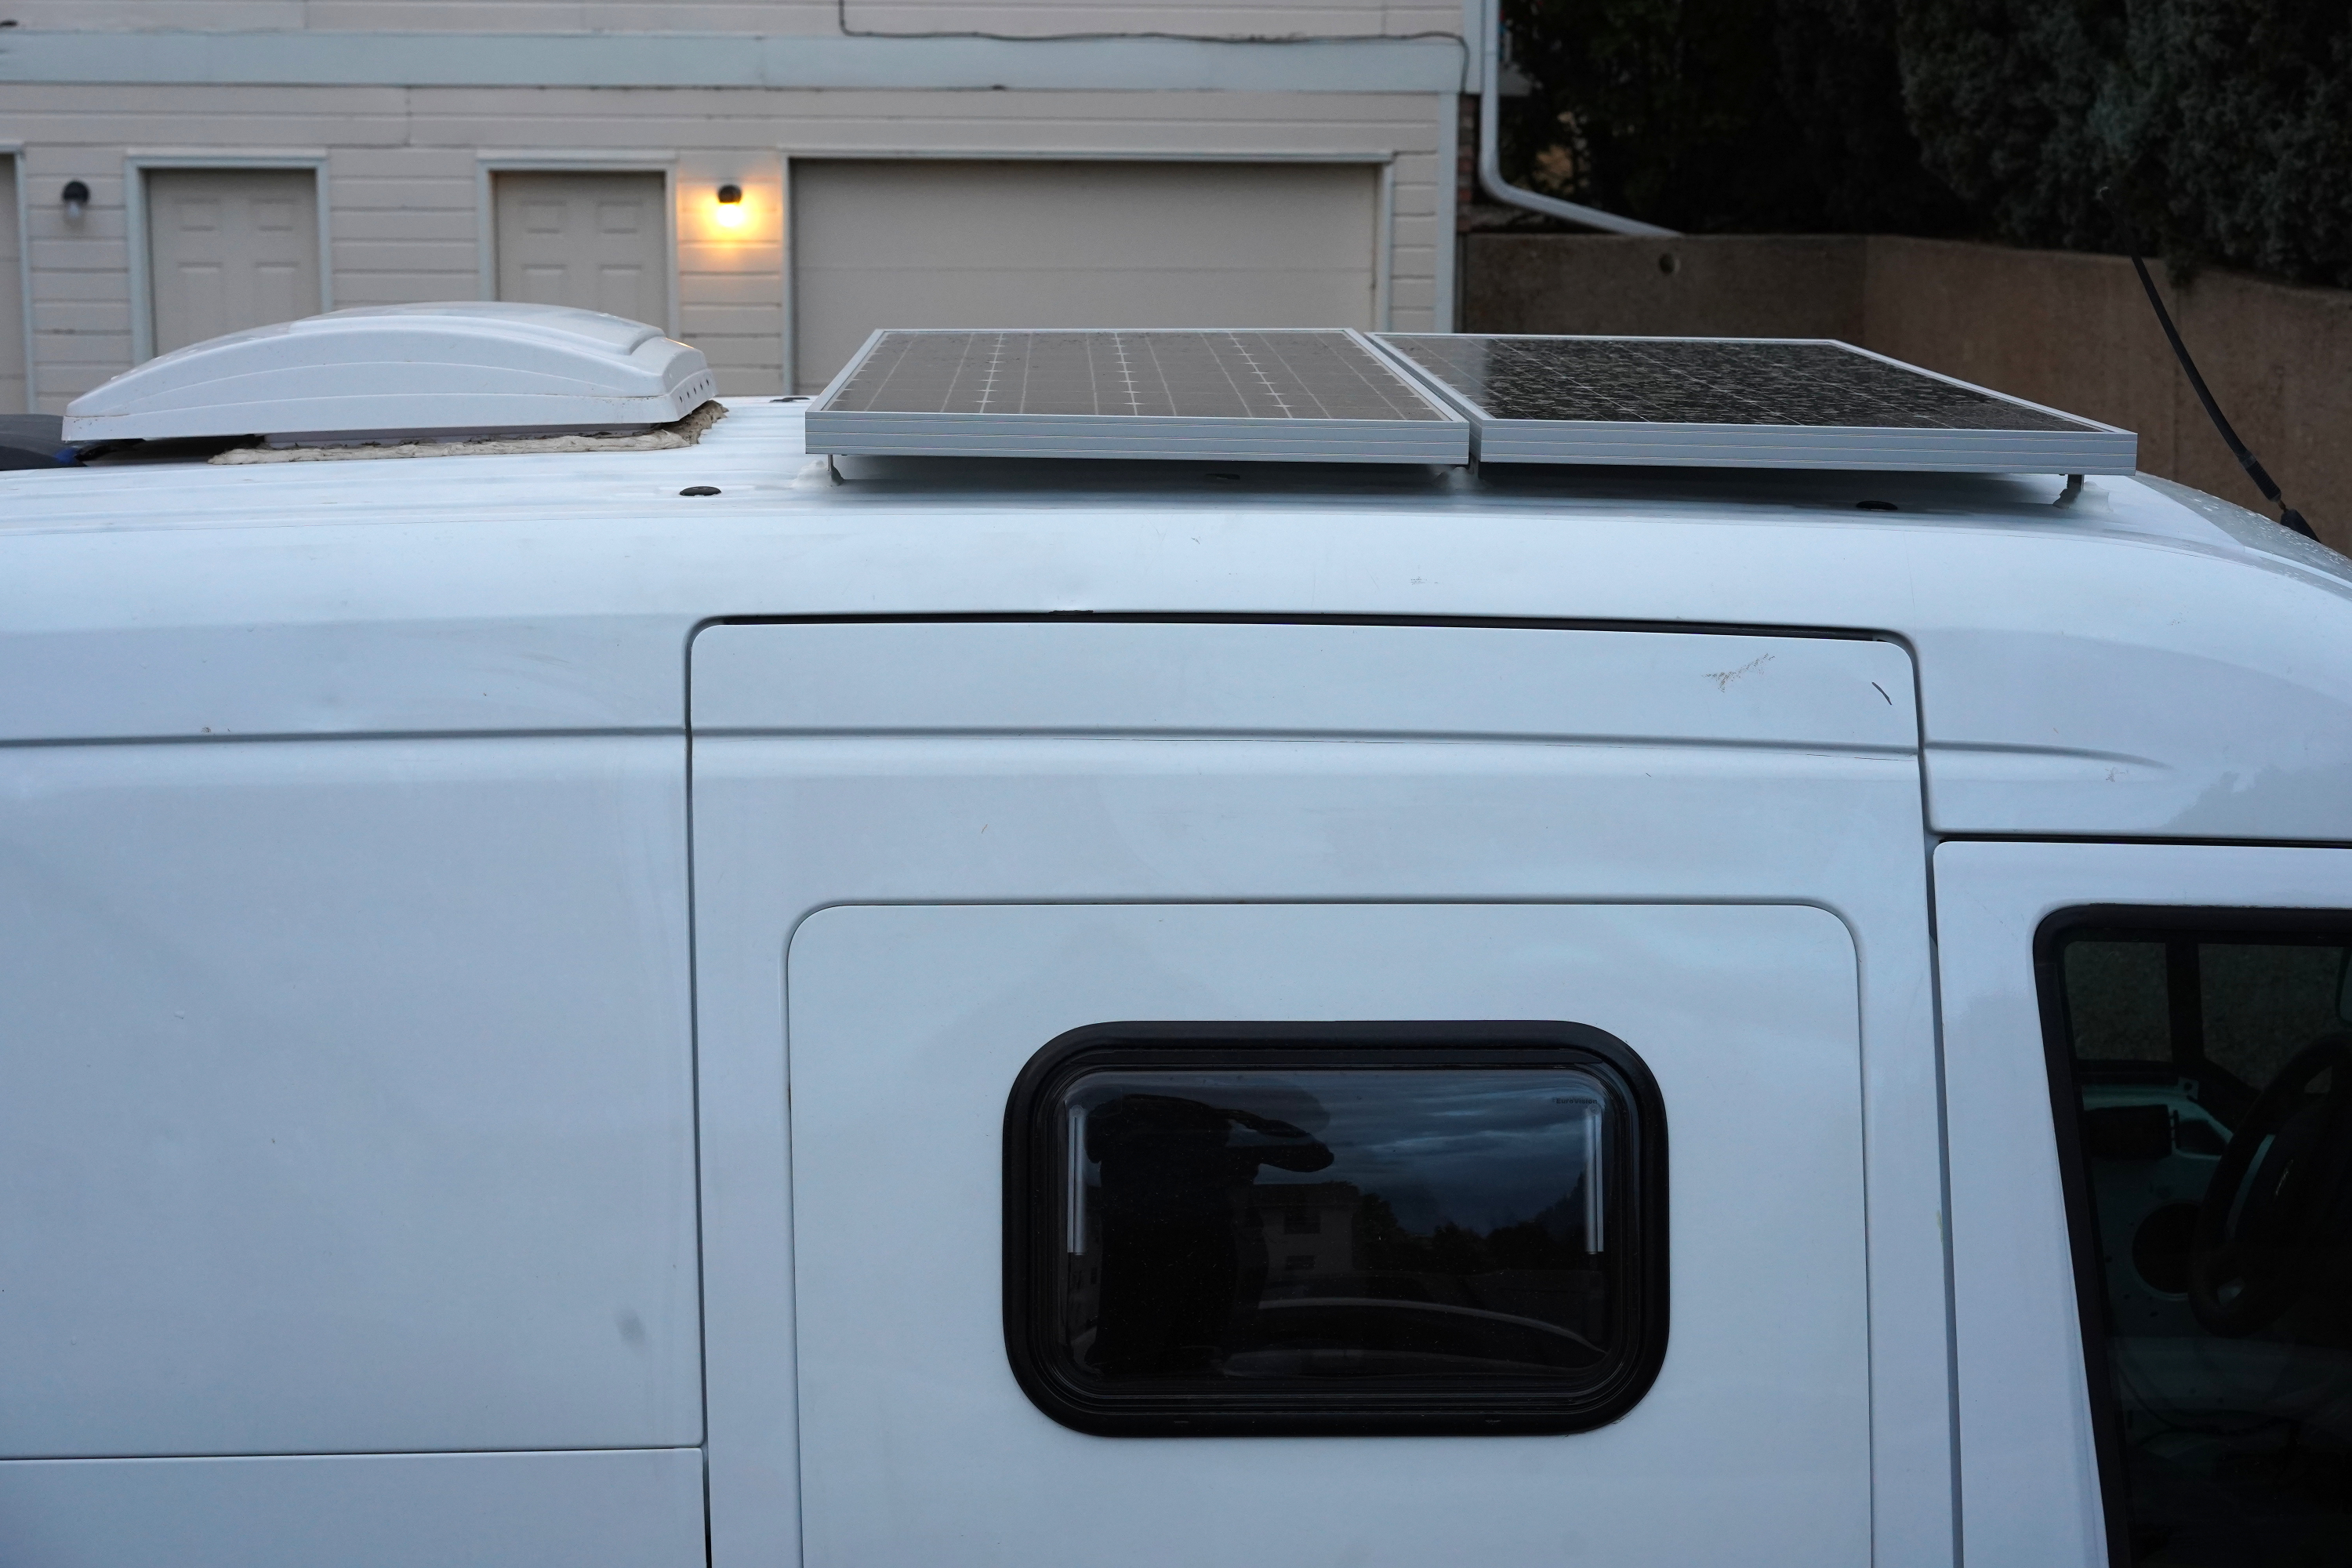
I realized I’d positioned my two solar panels too closely together only after drilling 12 holes for the 12 bolts that secure the panels’ 12 brackets to the van roof. By then it was too late to change course. Now, with the panels permanently mounted on the van, I can’t fit my caulk gun’s nozzle between the two panels. This means I can’t apply lap sealant to the panels’ two centermost brackets. Lap sealant is what prevents water from entering the van through the brackets’ bolt holes and then spitting onto my face as I try falling asleep in my DIY van.
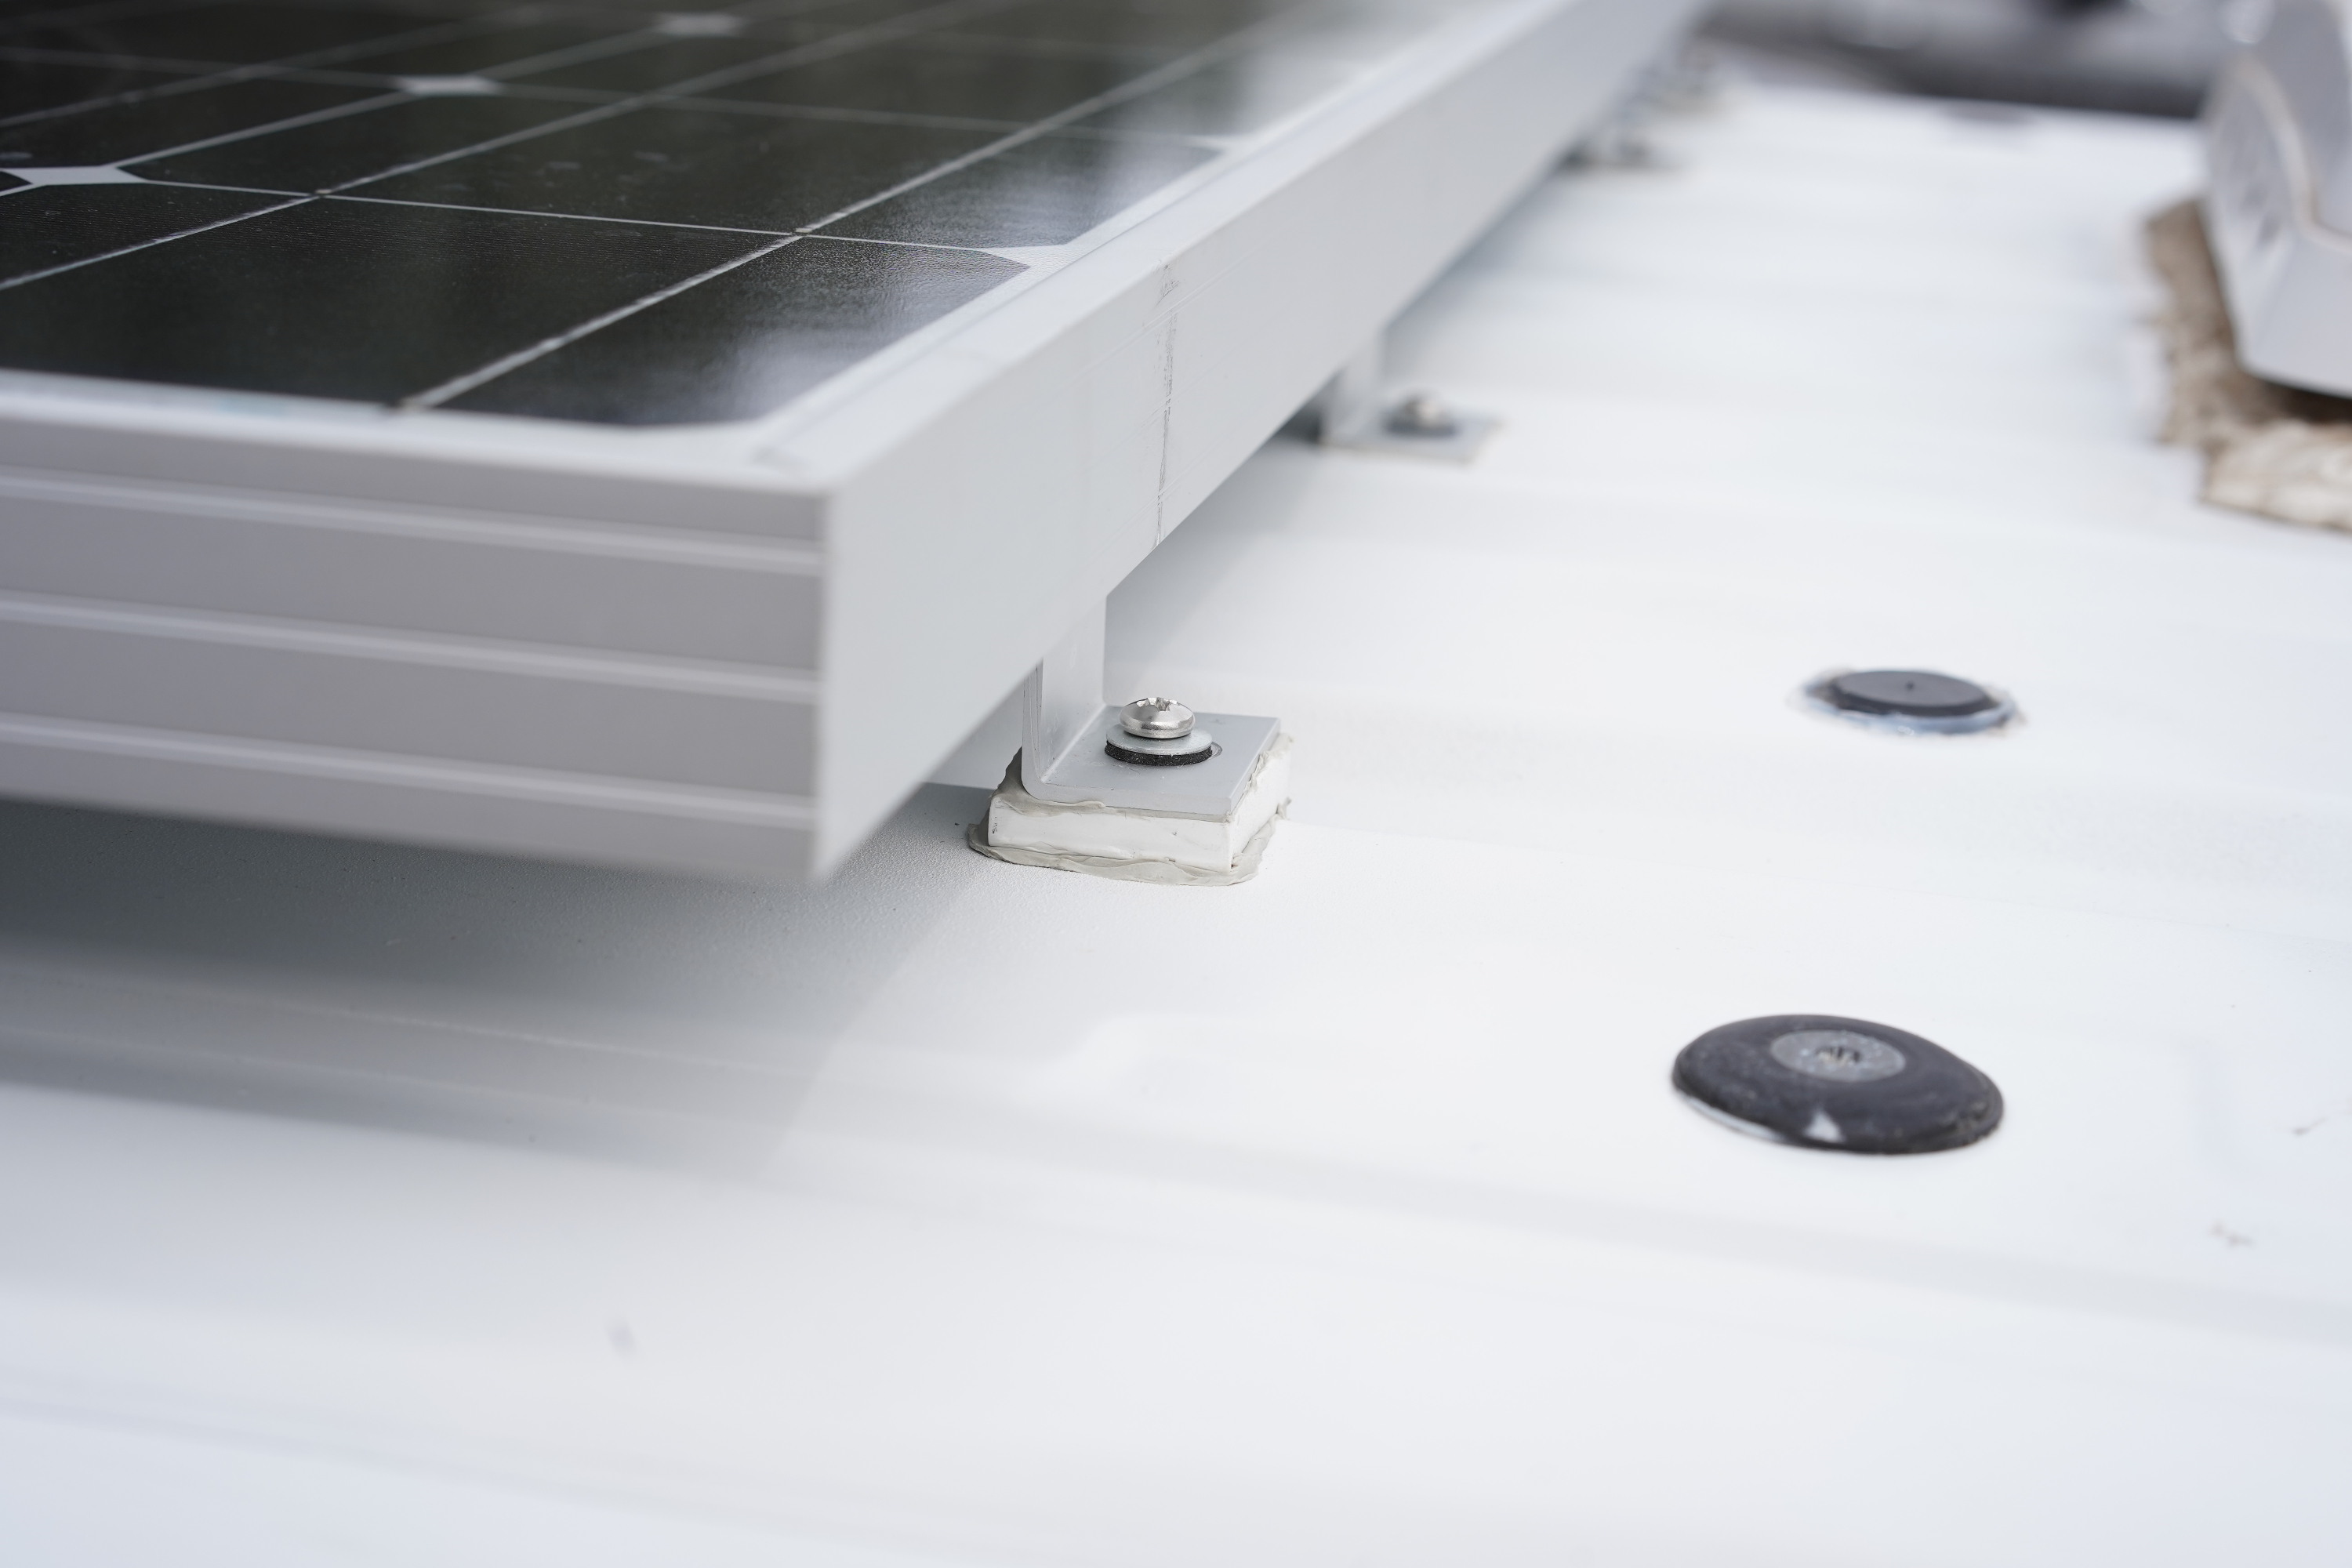
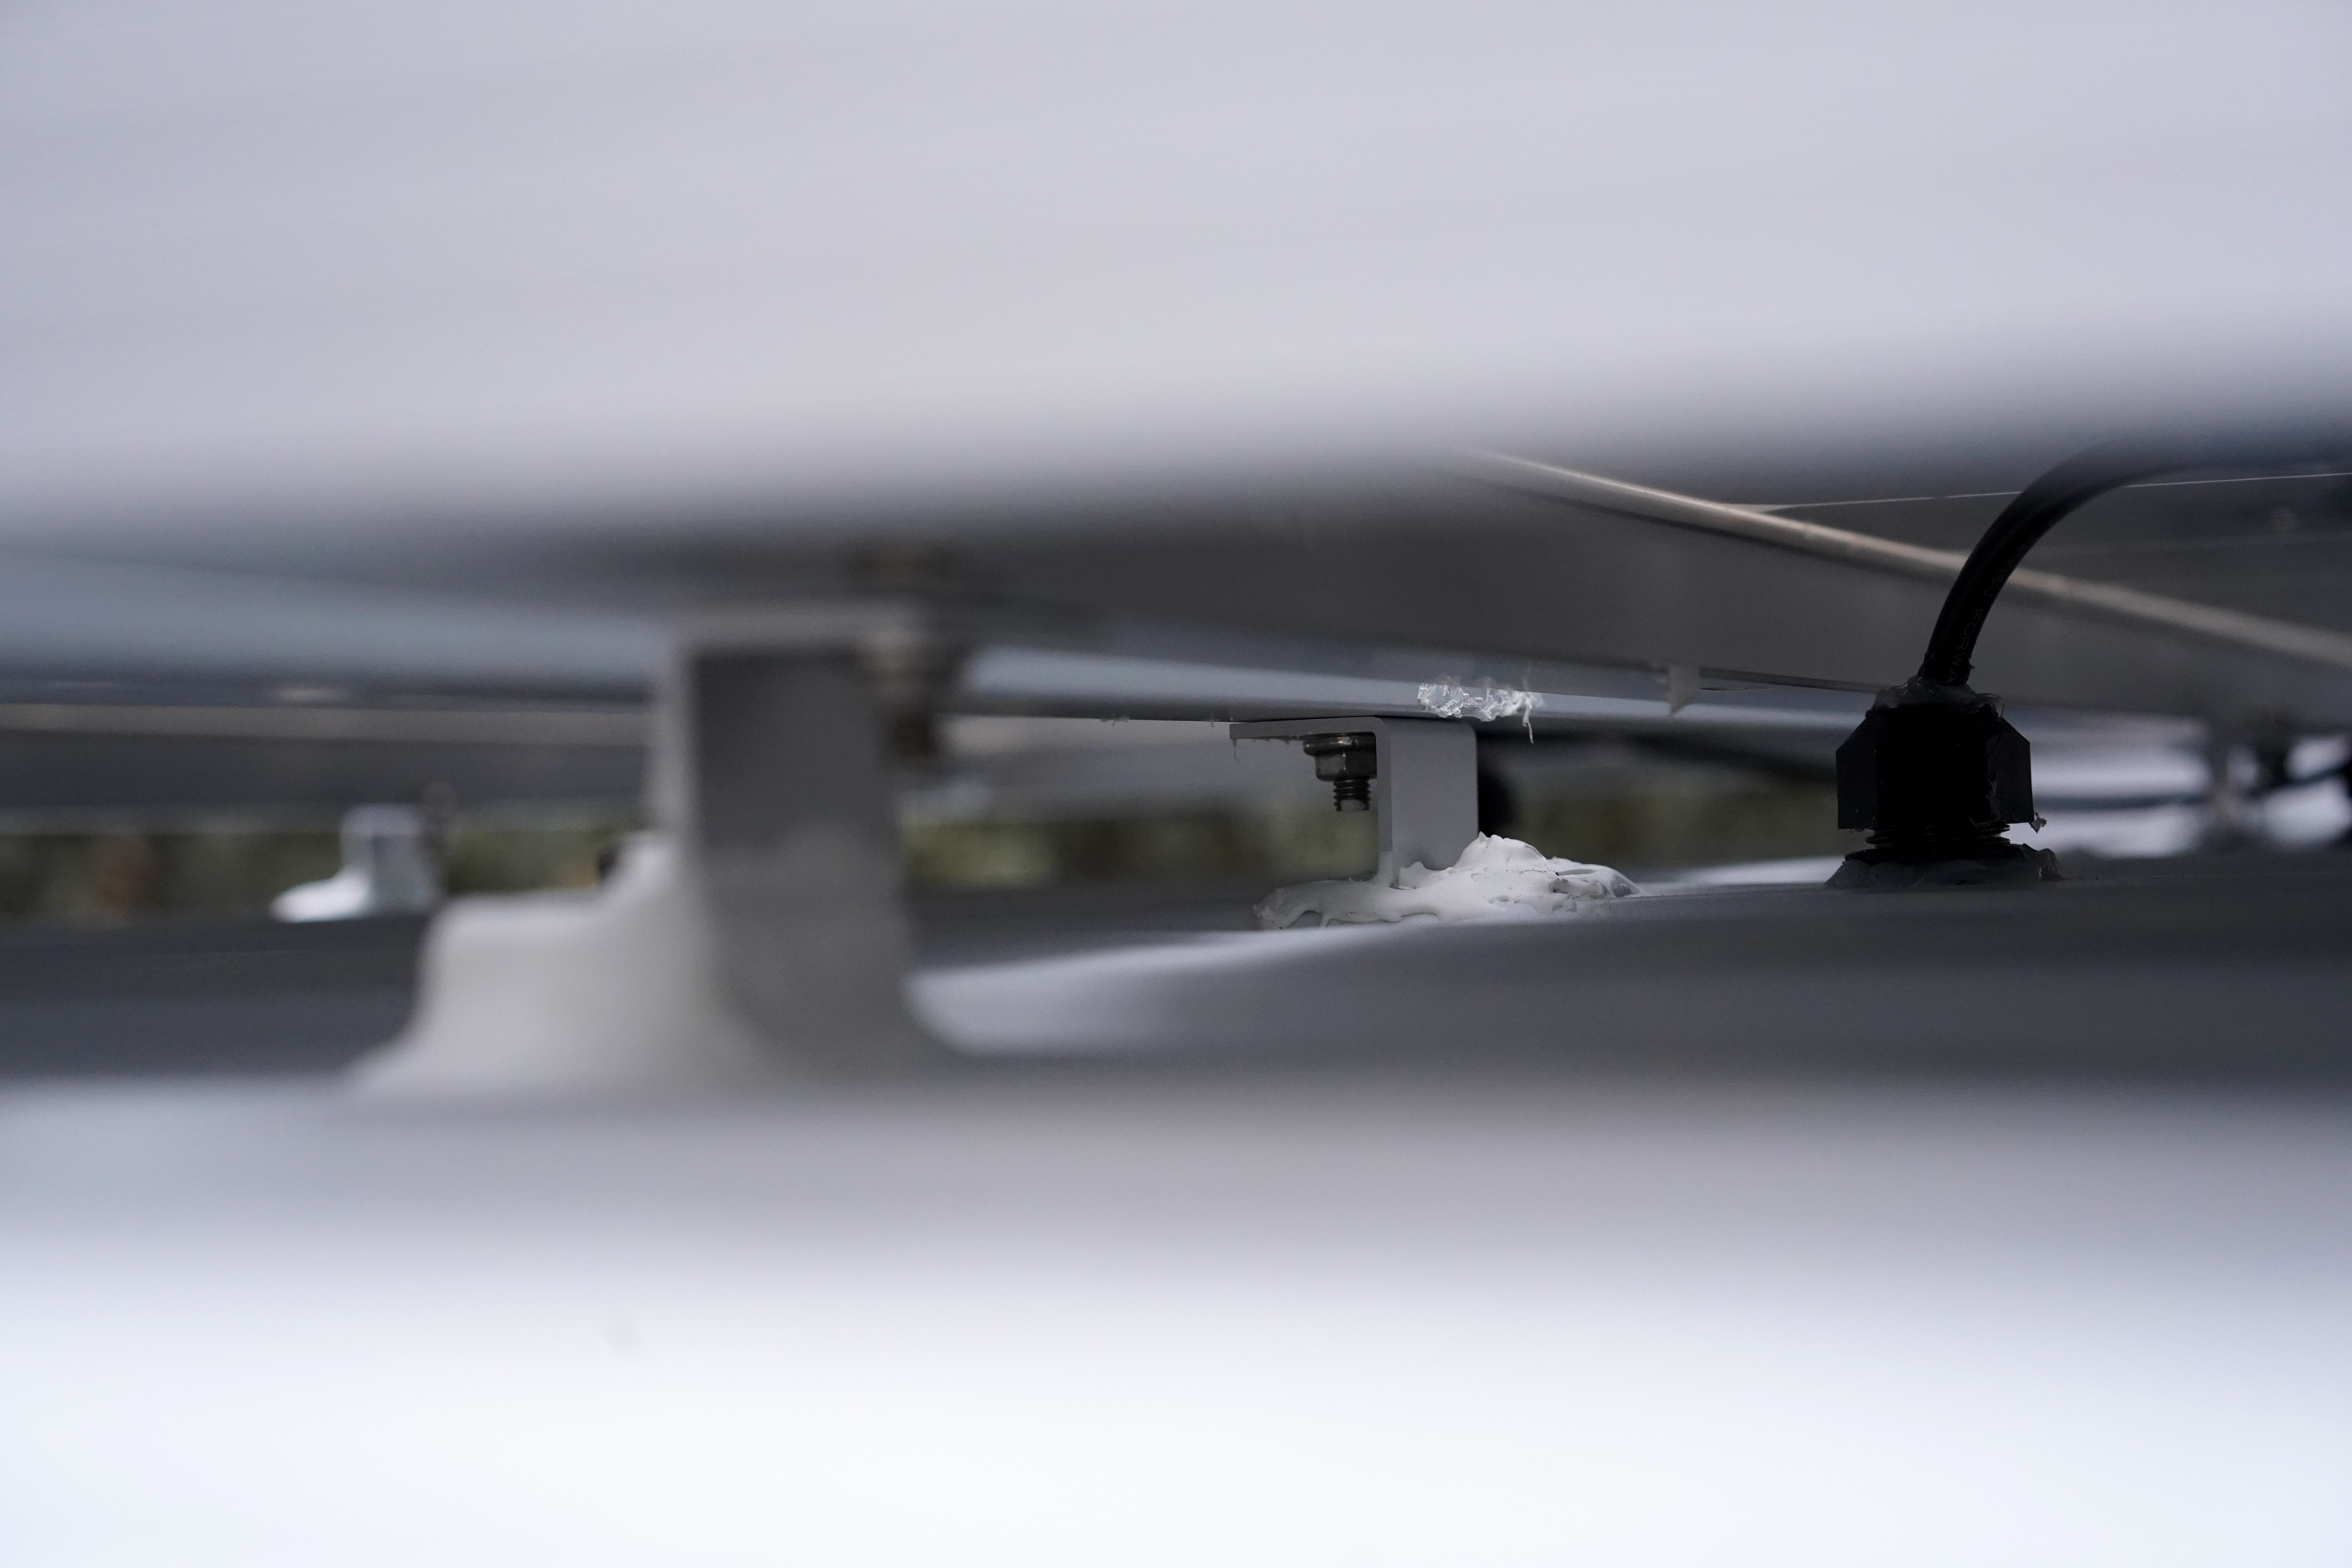
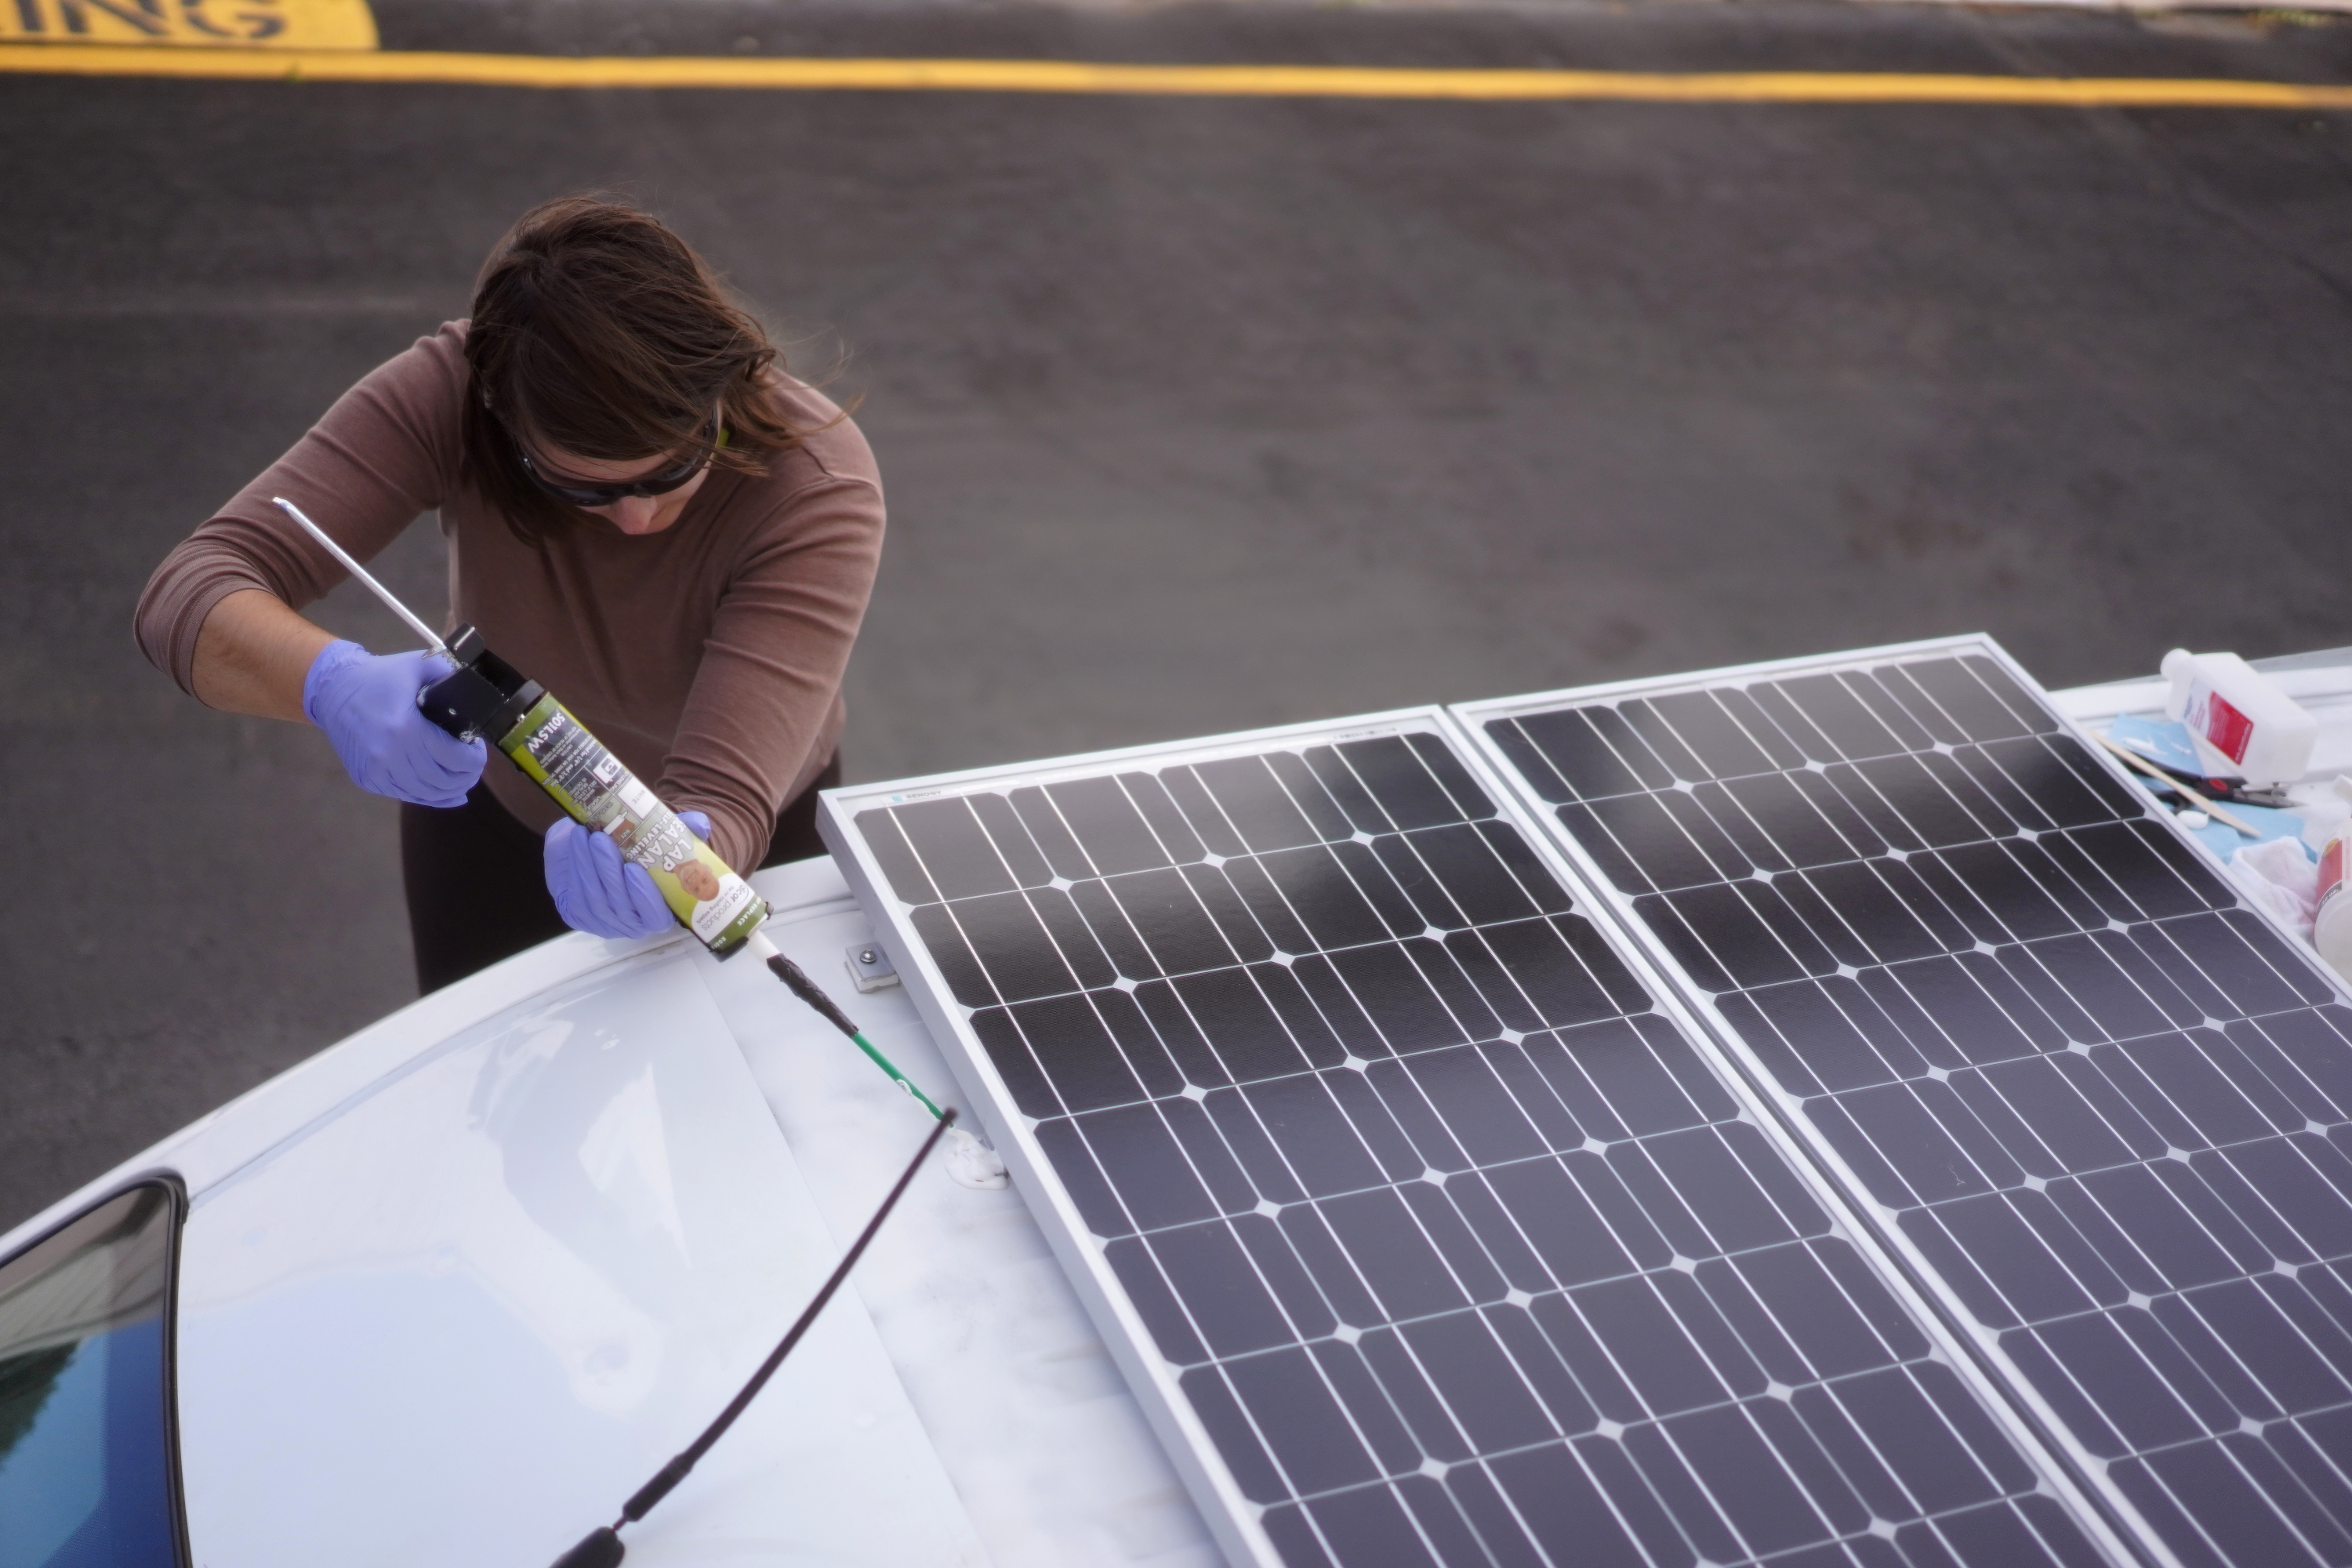
I tried extending my caulk gun’s reach by attaching a plastic Starbucks straw to the nozzle with duct tape. This helped me reach the backsides of some of the perimeter brackets more comfortably (as shown above), but it was still too short to reach the two central brackets. To get to those two, I’ll need another, longer straw.
One of these days, once the snow goes away (it’s snowing in Colorado right now!) and the roof dries, I’ll walk to 7/11, acting all casual, like I’m just thirsty and checking out the Slurpee selection. Do I want Wild Cherry? Or Pina Colada? Or Mystery Flavor? I don’t know! Then I’ll quickly grab the longest straw, strut out the front door, and she gone.
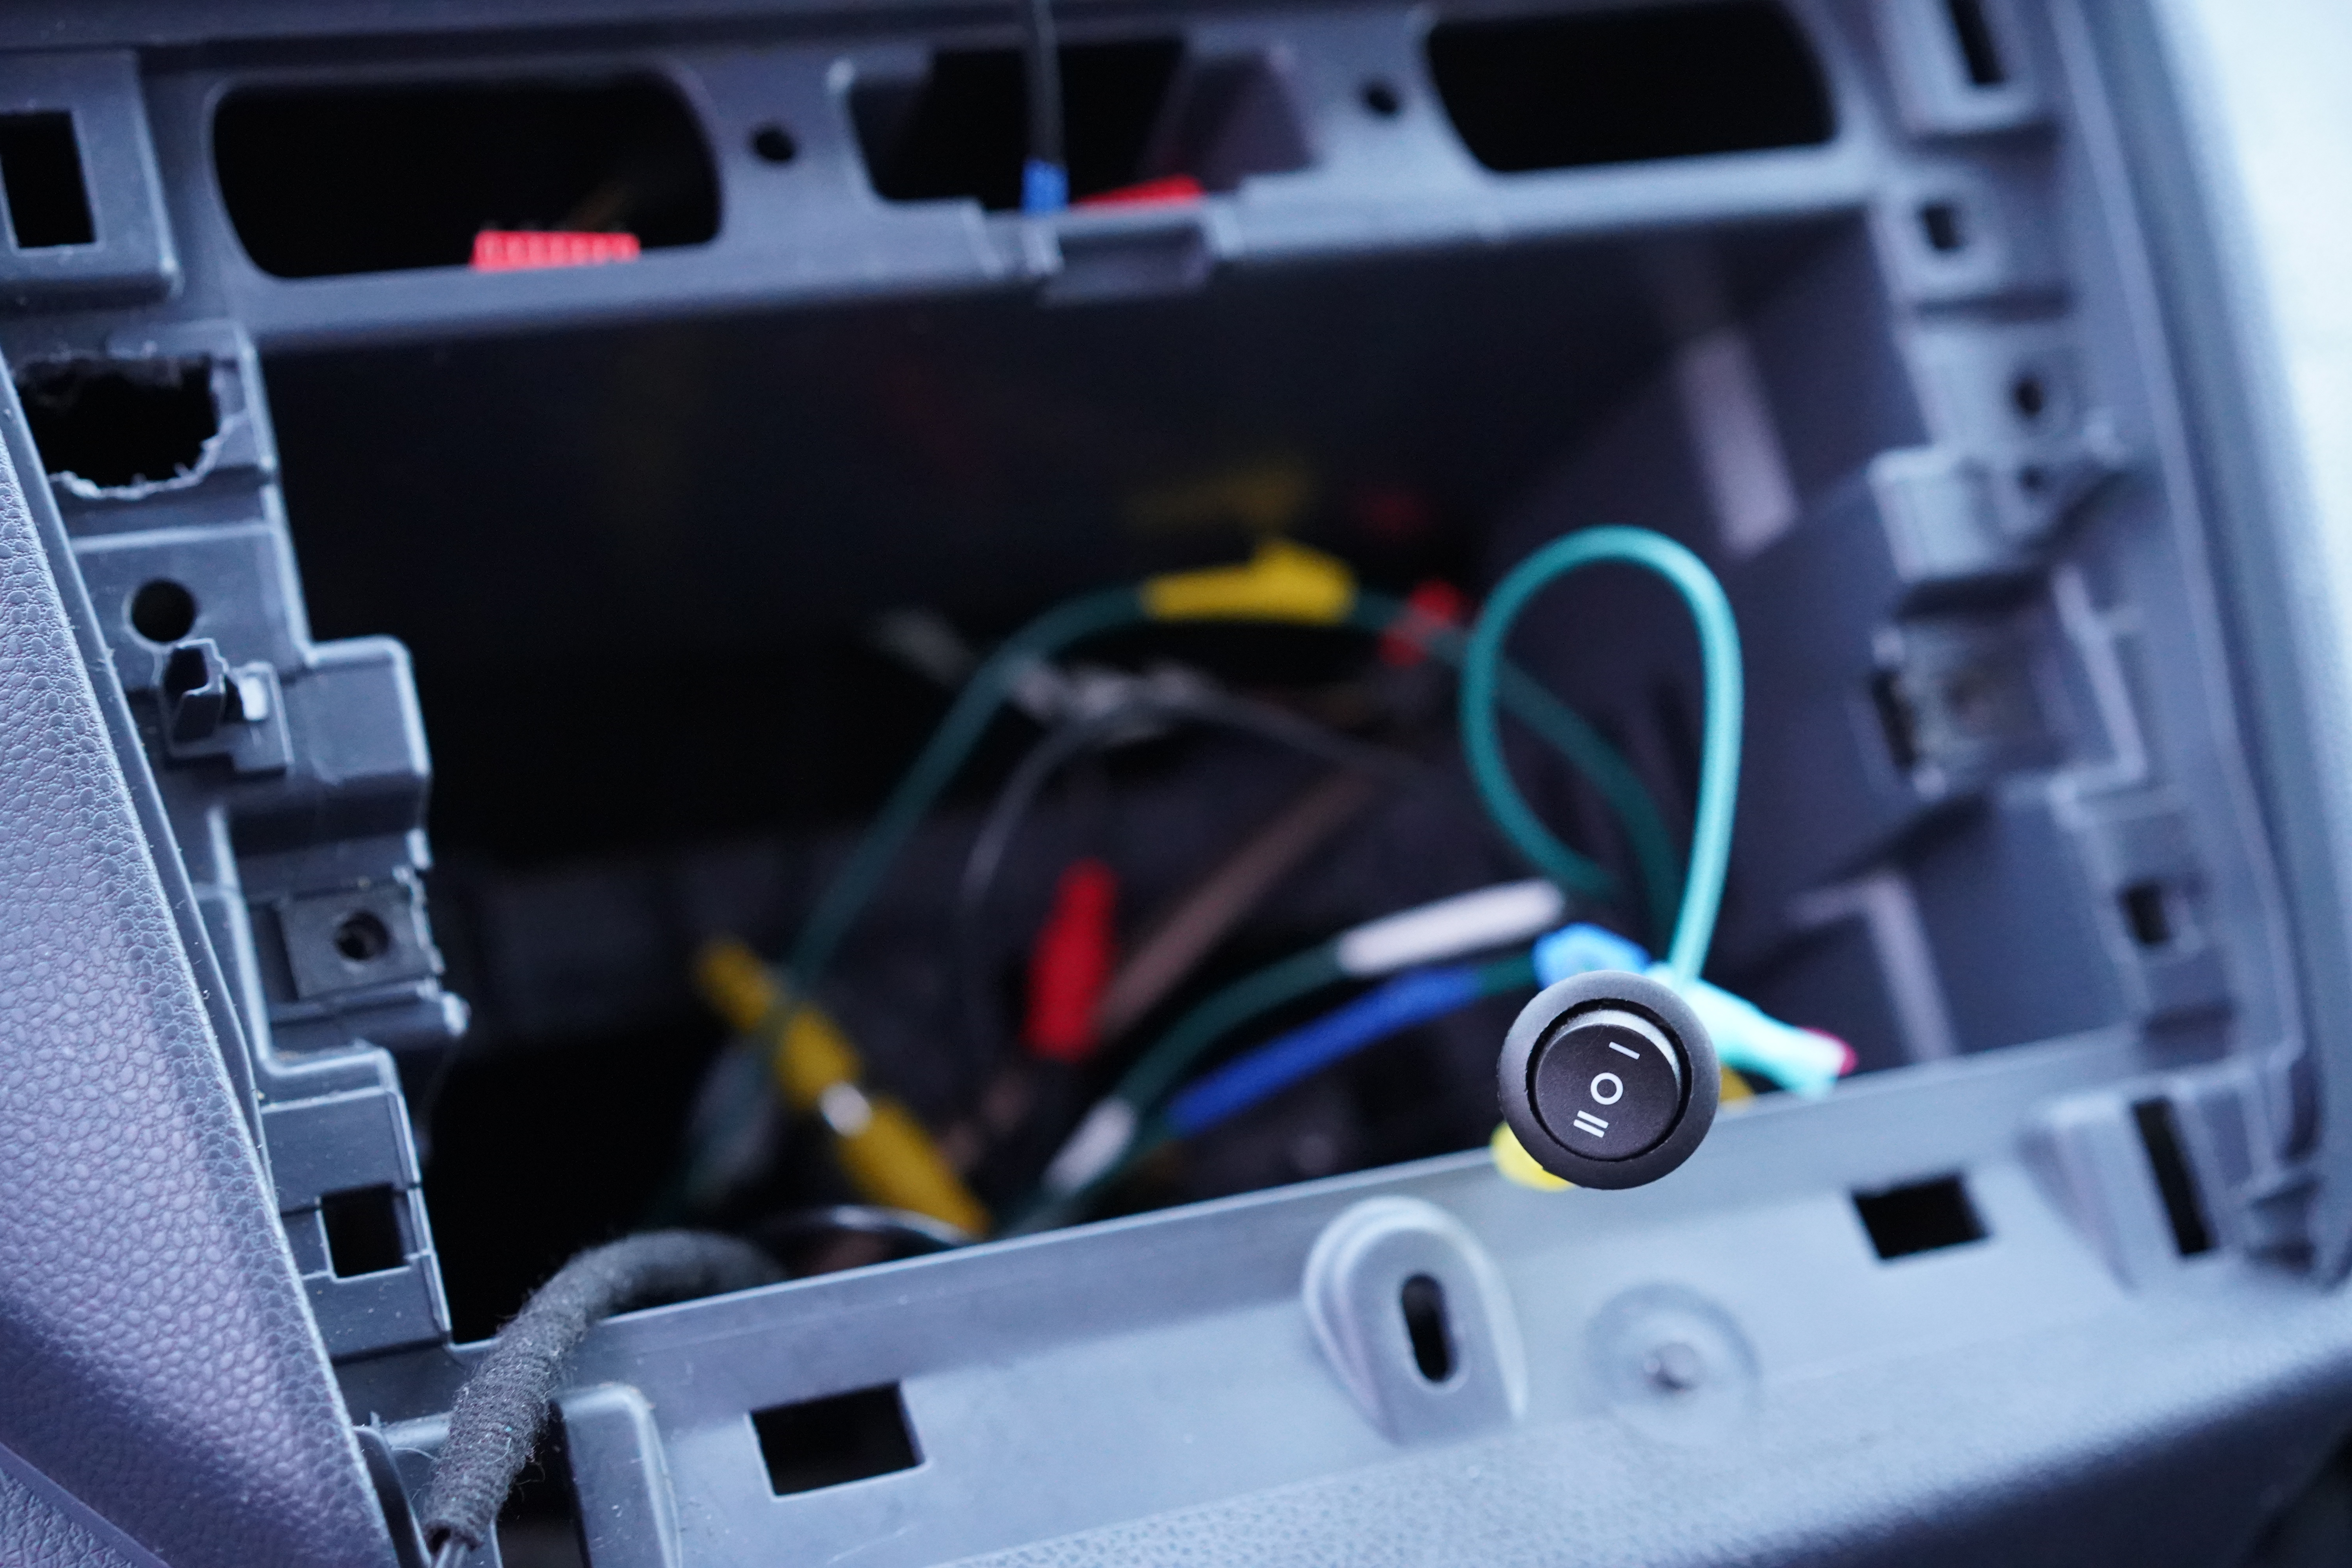
Problem #3: My newly installed backup camera only works when it wants to.
When I first started looking for a van, I refused to consider vans without rear windows. No way was I driving in cities without a clear view of what was going on behind me. Then I sucked it up and bought a cheap van with no rear windows. Life is a succession of ever-lowering expectations.
I decided I could mimic the function of rear windows by installing a custom backup camera system. I’d wire the camera system for two modes: In the first, more traditional mode, the system powers on when the van is in reverse. In the second mode, the camera stays on all the time, acting as a rear-view mirror.
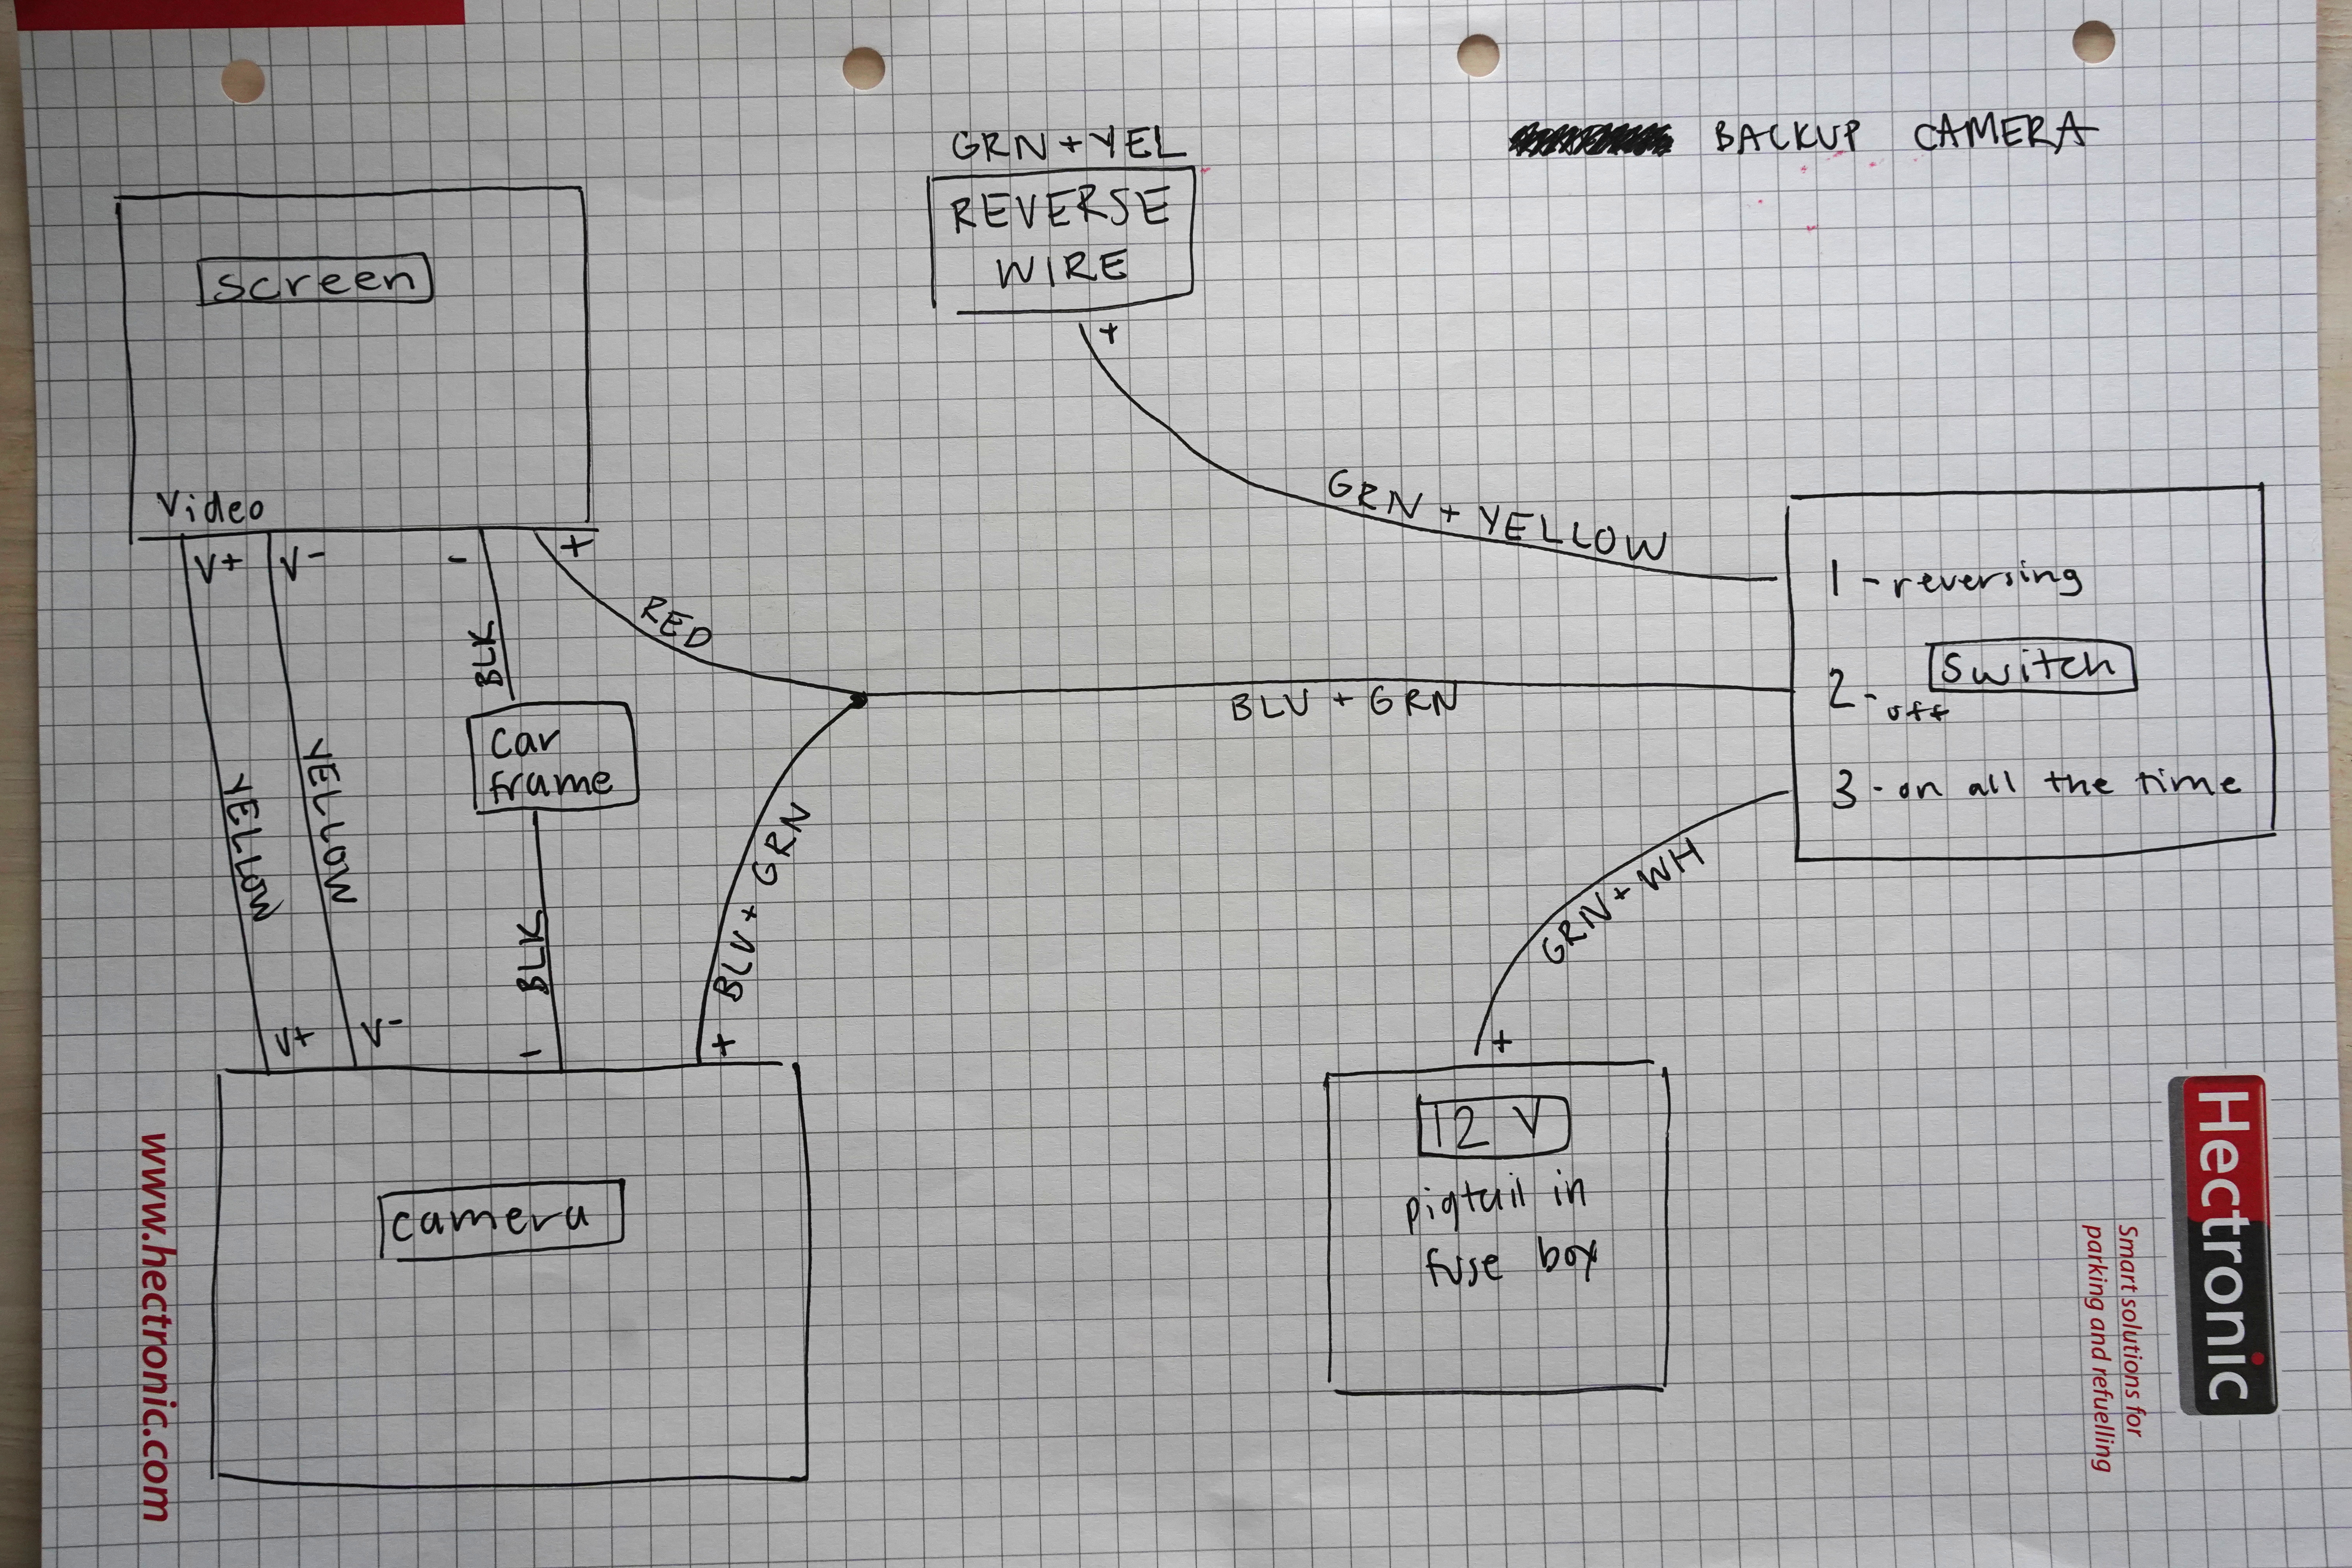
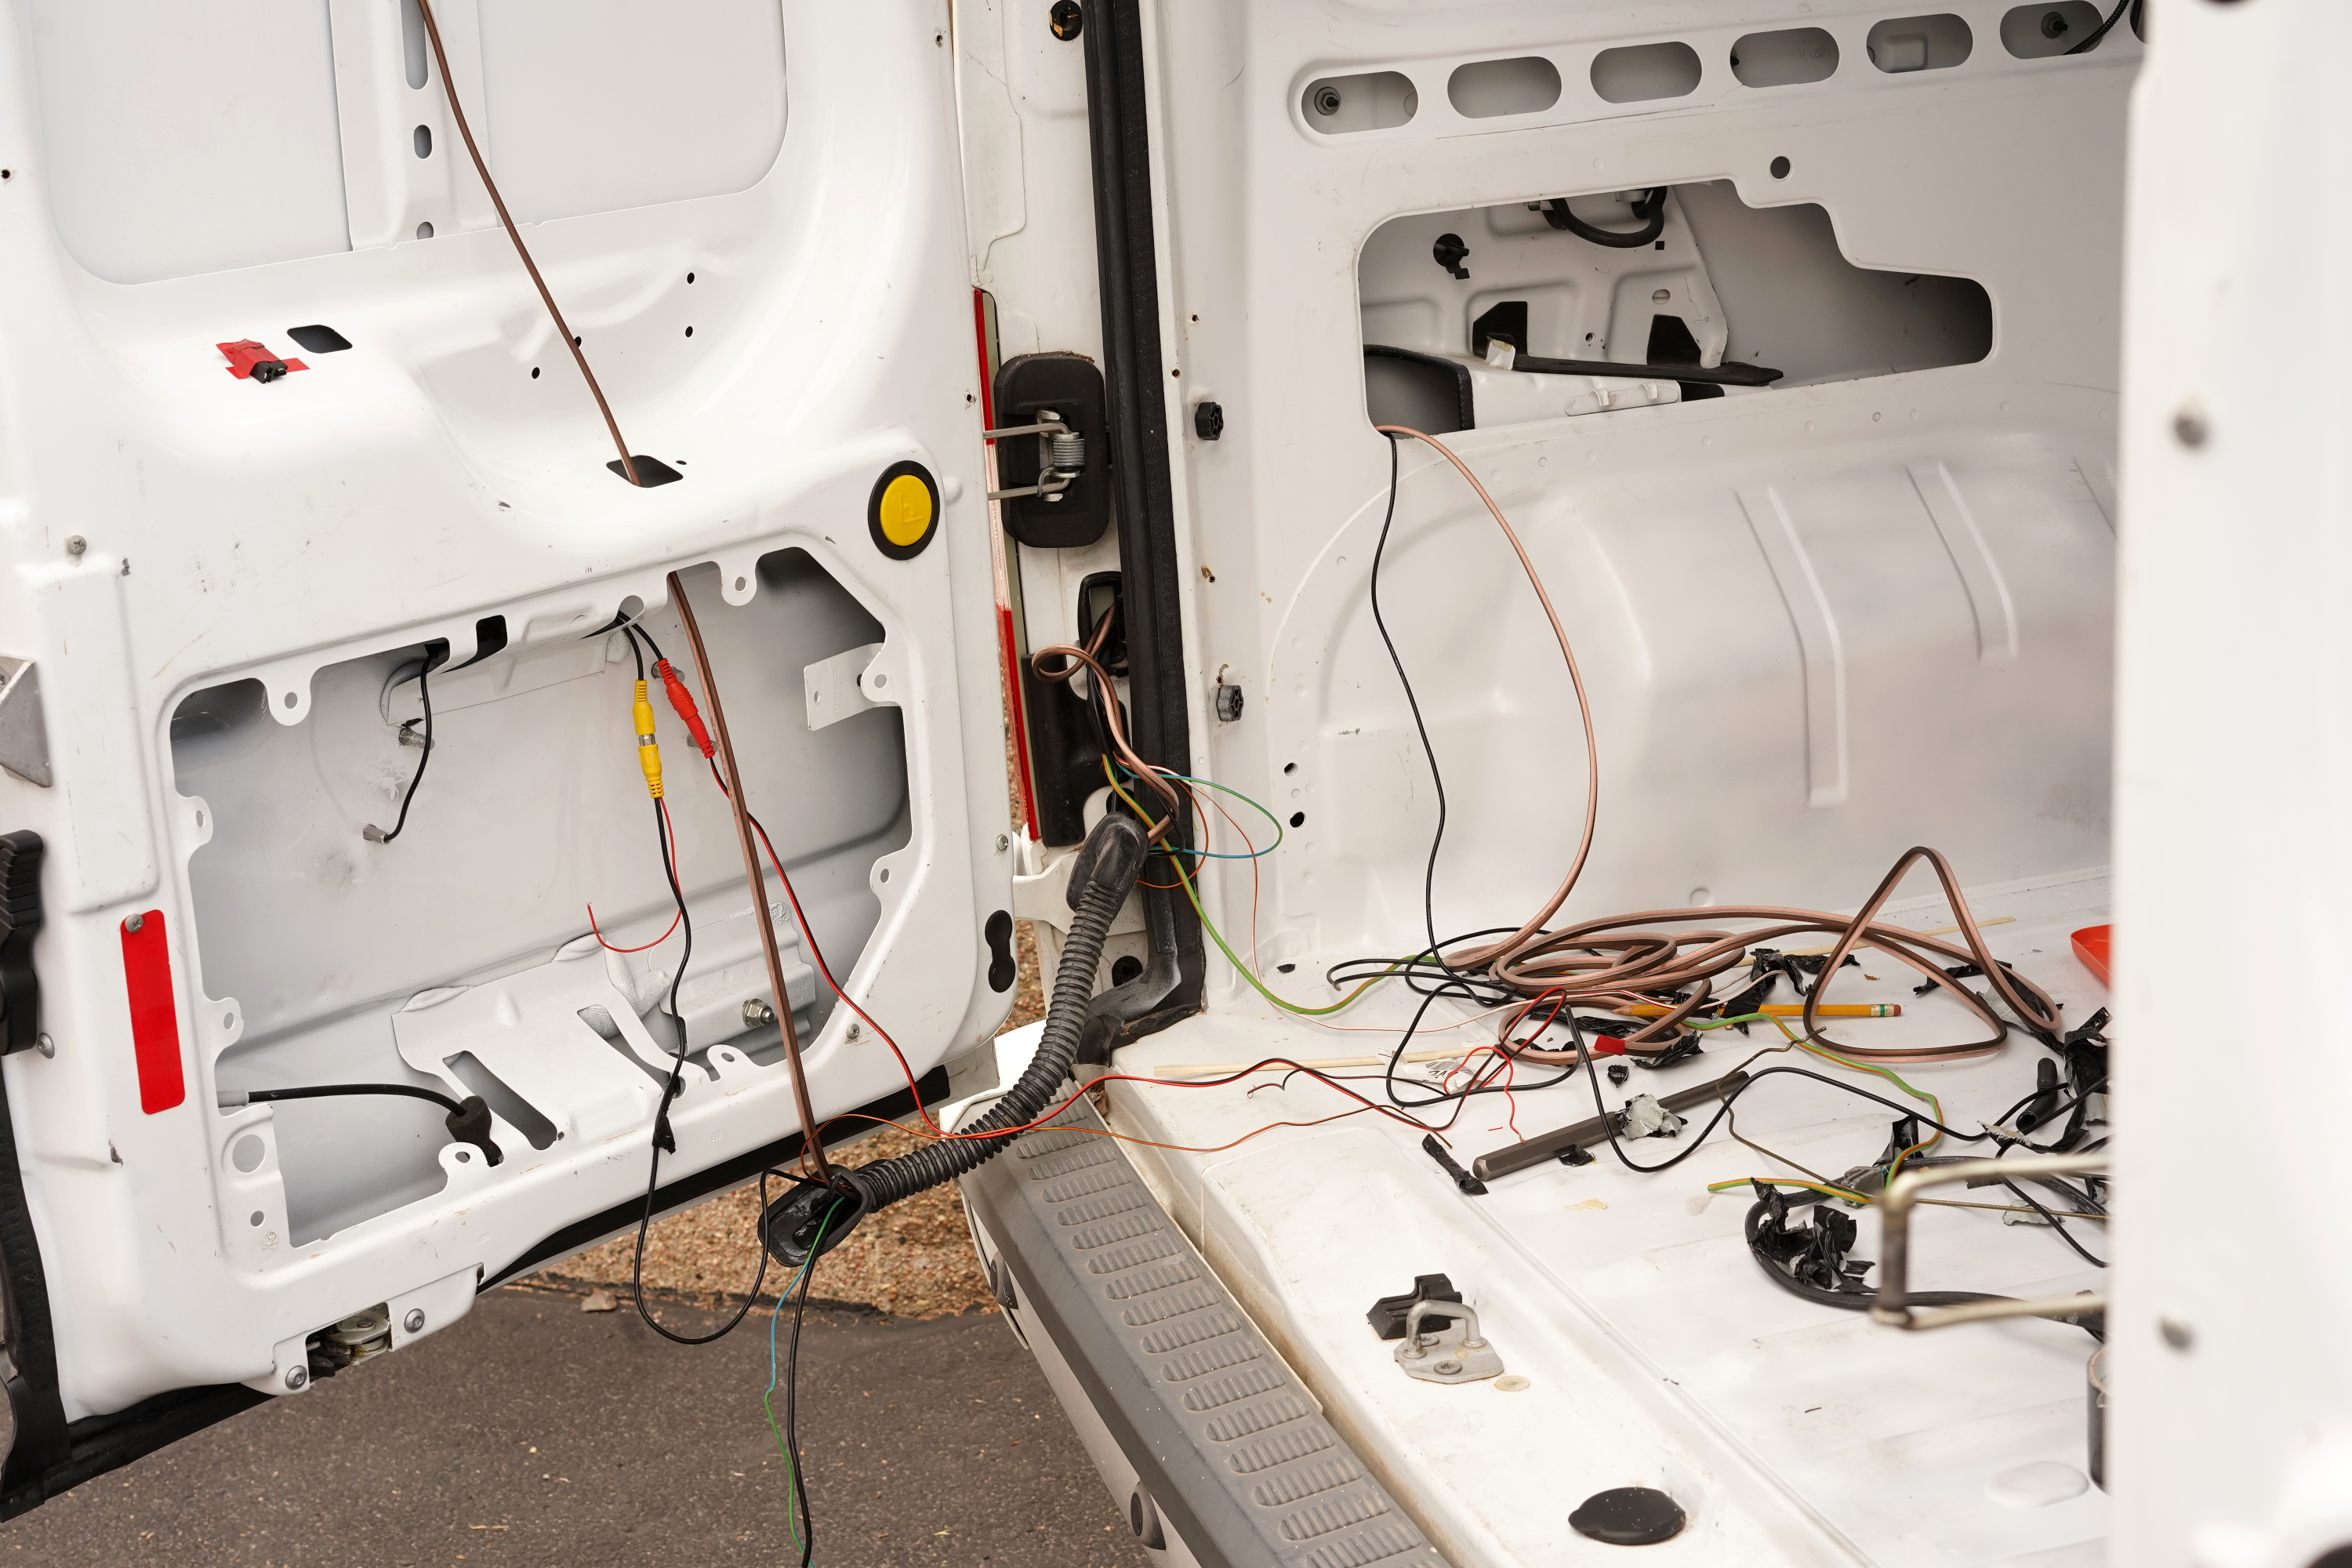
To complete the circuit, I had to dig into the van’s existing electrical system. I located the van’s reverse-light wire and spliced into it. Now the camera system would know when the car was reversing. I also spliced into some of the van’s existing ground cables.
Then I cut some other wires, soldered them together, untangled more wires. Just before midnight, at the end of one very long day, I turned on the switch to the camera, and the monitor immediately turned on. It worked!
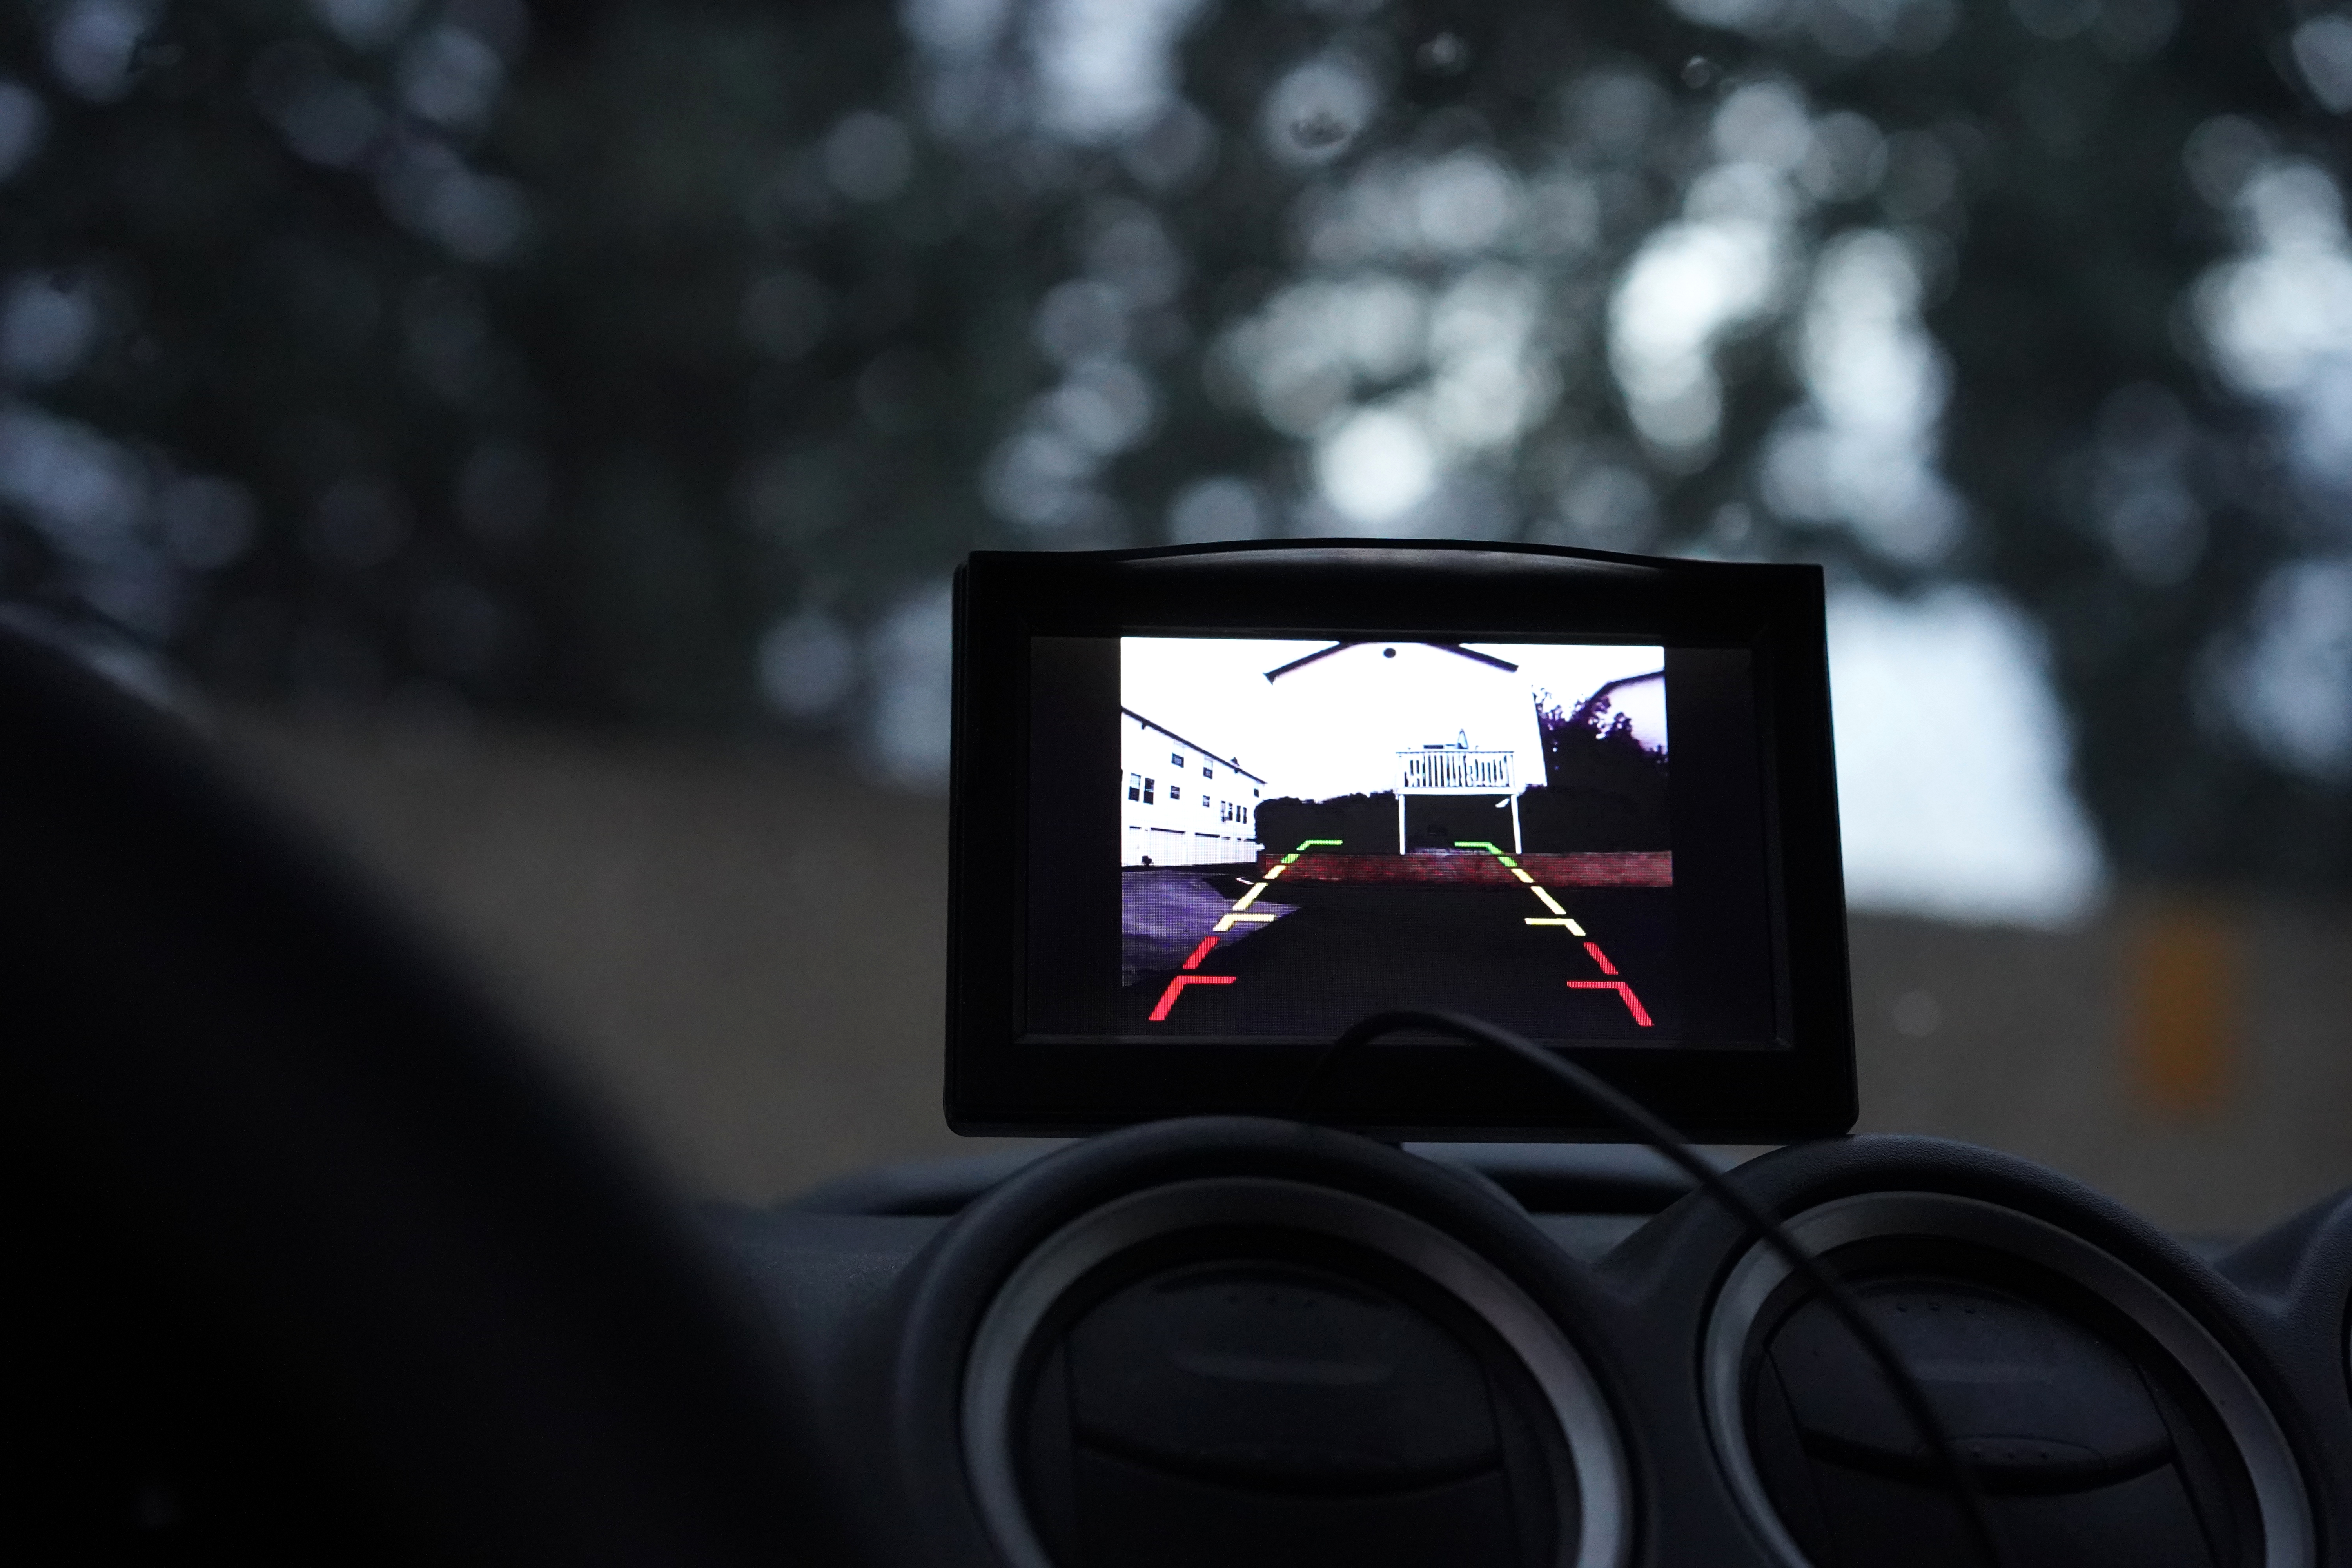
Once I confirmed that the camera worked, I decided to move the van from the no-parking zone behind my garage to a proper parking spot. I turned on the ignition. Aaaaaaaaaand the camera immediately stopped working.
Later, I realized the camera’s hiccup had nothing to do with me starting the car. Remember, I was testing the camera at night, and as soon as I started the car, I also turned on the headlights. What kills the backup camera is the headlights. Some cars—apparently the Transit Connect included—don’t really run at a true 12 volts, which is what my backup camera system needs. The Connect’s system is designed to drop in voltage after the first fuse box after the battery. Apparently the Connect has enough juice to run the headlights but no more.
Fortunately, I’ve figured out how to fix this problem. I’ll install a relay. A relay senses when a circuit doesn’t have enough juice to be completed and helps out by getting extra juice directly from the car battery. That’s all I know about relays for now, and that’s how it’ll be until my relay arrives in the mail. I’ve learned that it’s best to research no more than whatever project I’m tackling within the next hour. Otherwise, it’s too easy to enter an internet wormhole. Start with relay research and, through a serious of bad decisions, end with 59 videos of gas station encounters (yes, I’m linking to it again.)
Problem #4: The floor underneath the passenger’s carpet is wet and moldy.
While wiring the backup camera, I also routed wires for two rear speakers that I’ll eventually mount once the van’s walls are up. On the passenger side, the speaker wires will travel from the radio, behind the glove compartment, and then down to the floor, where the Connect already has a bundle of wires running all the way back to the cargo doors. To access the floor, I took out the passenger’s seat, lifted the carpeting, and discovered something gross.
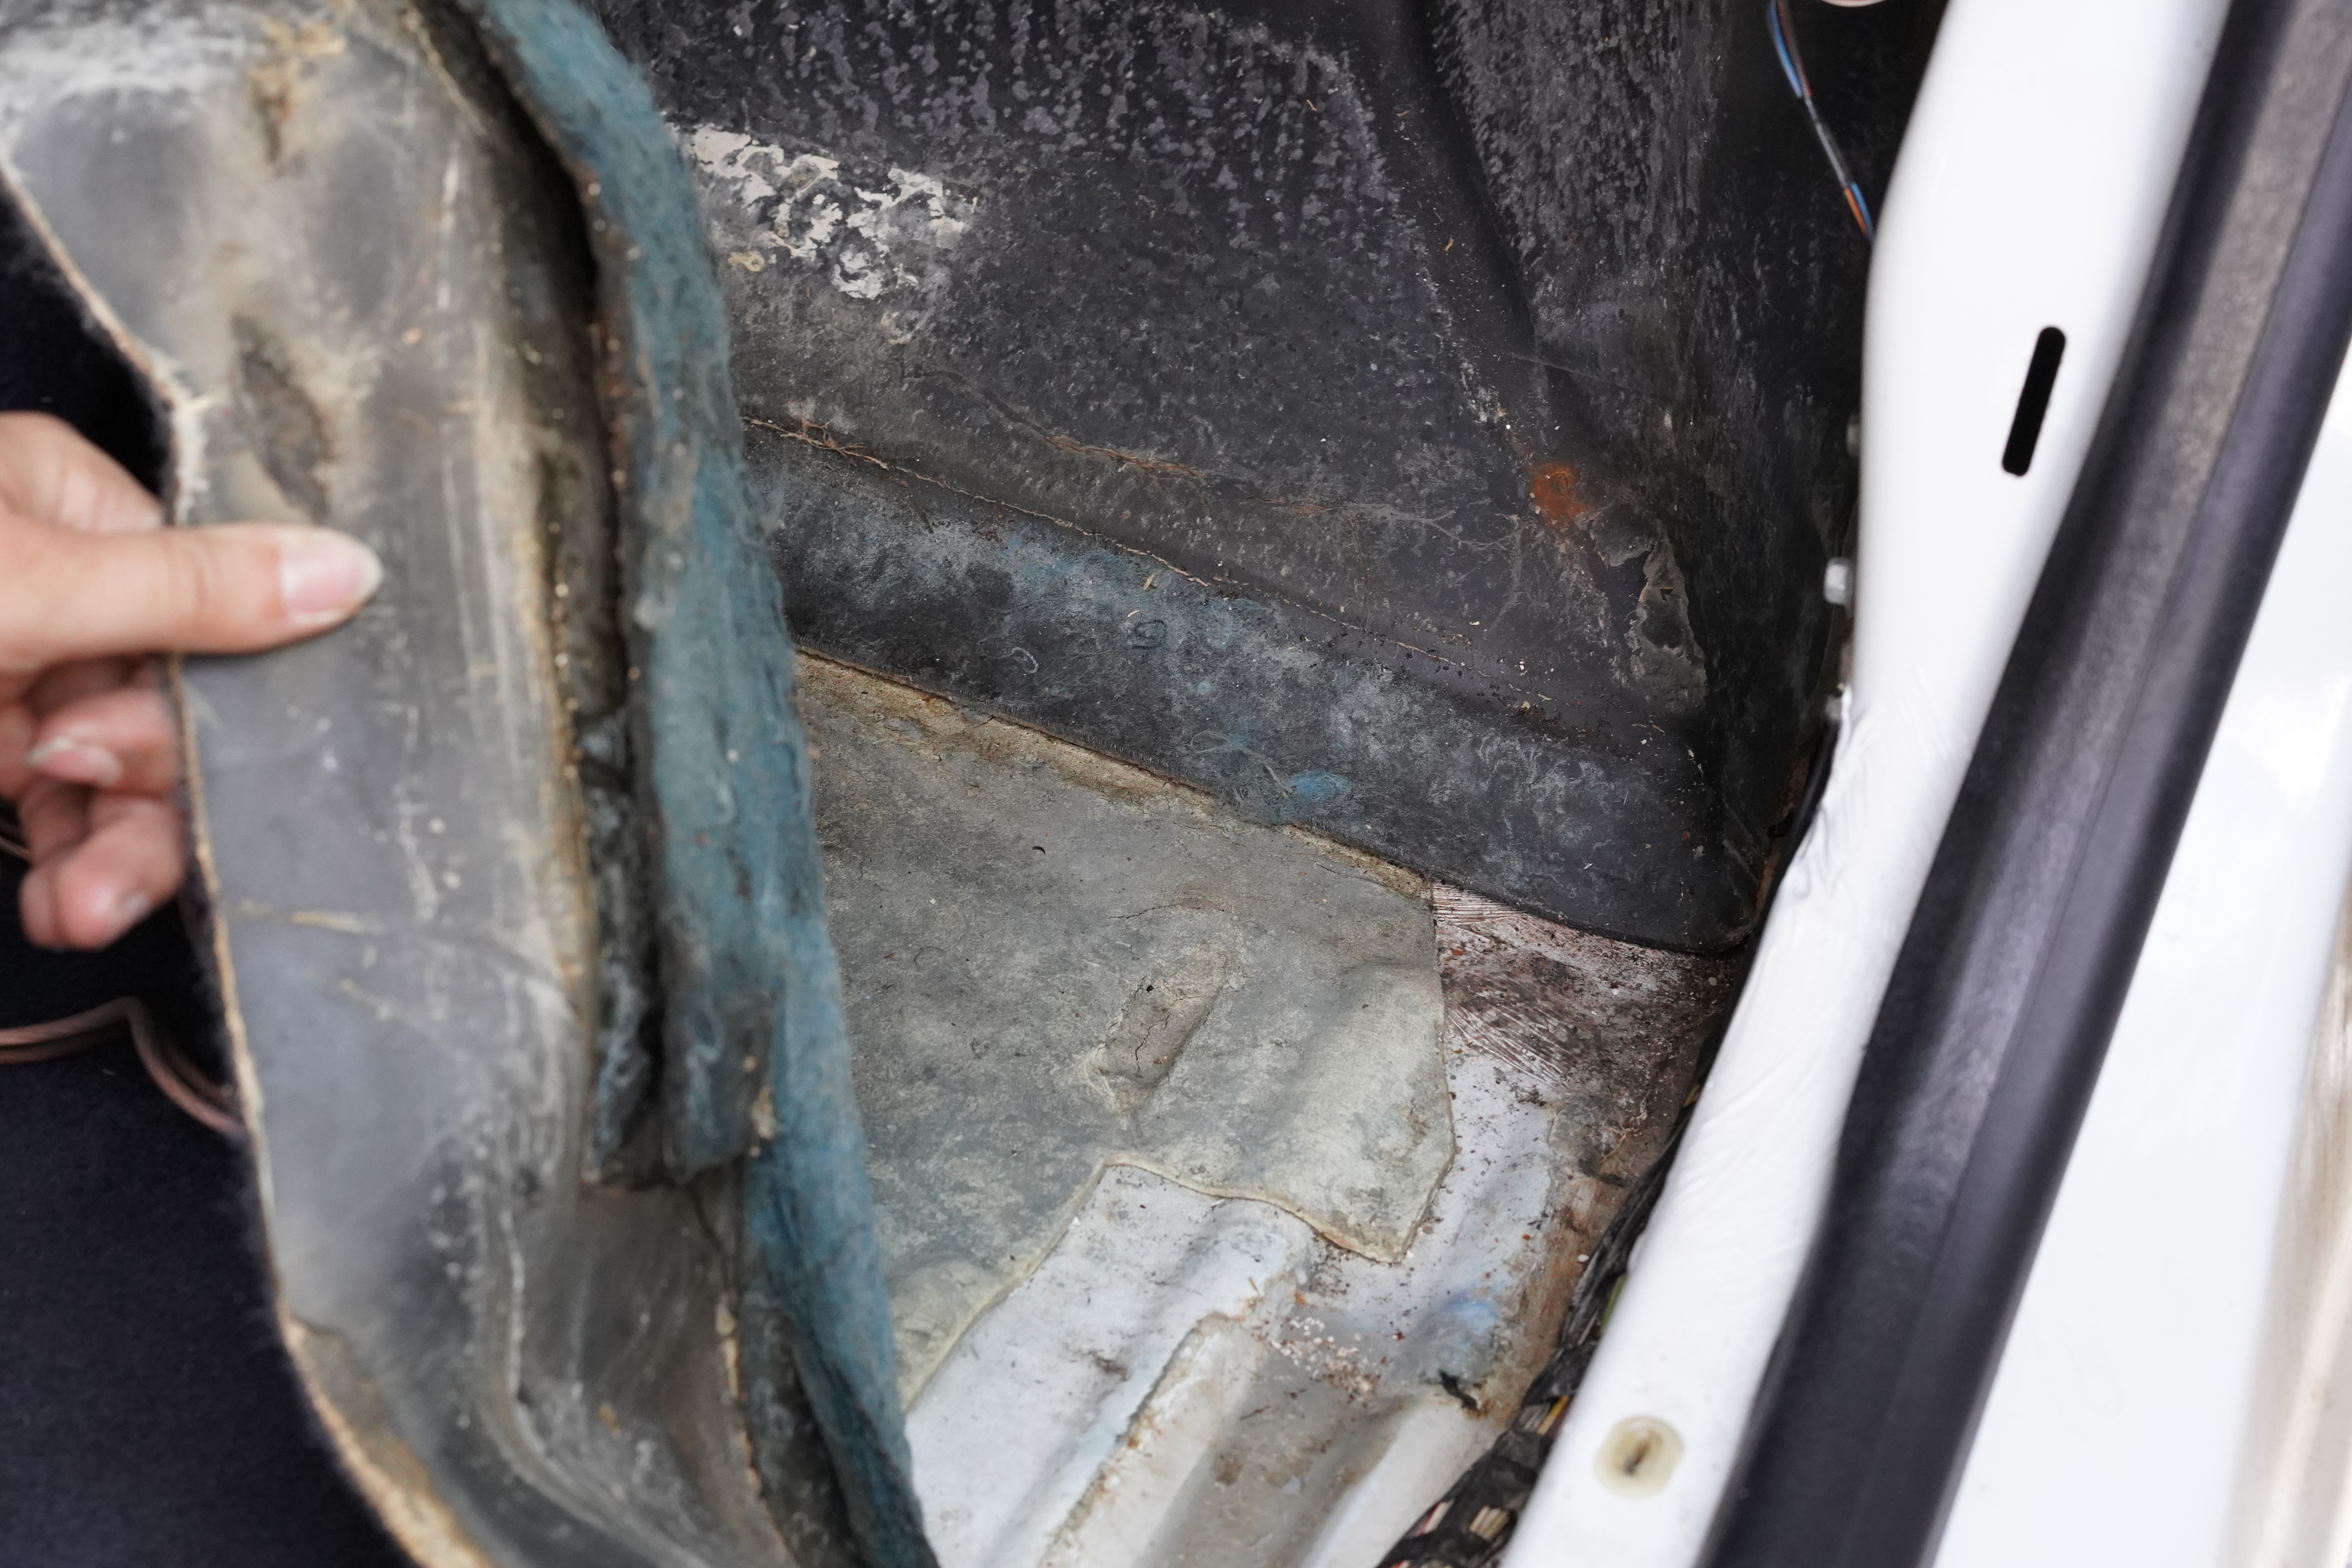
Back when I was learning how to inspect used cars, I read that water damage, especially in the passenger floor area, is a very bad sign. Often, it indicates problems with the heater core, which can cost up to $1,000 to replace. That’s why, as soon as I saw the water, I got pissed. So pissed, I decided to ignore the problem for a while. I propped the carpet up with the piece of metal I’d cut out of the van’s roof when installing the fan. Then I called it a day. Back in my apartment, I watched the early afternoon sky darken. It started to rain.
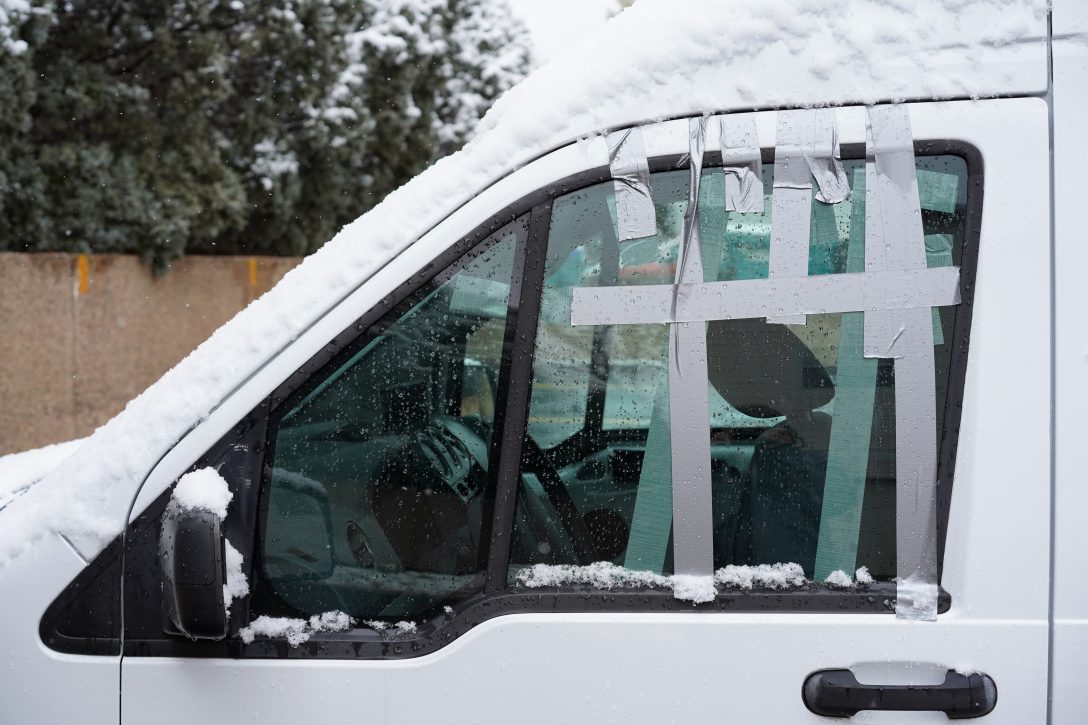
The next day, I noticed a streamlet of water descending from the top of the glove compartment housing to the passenger floor. It couldn’t be the work of a leaky heater core, which only drips when the heat is on, and I hadn’t started the car since discovering the water damage. I examined the passenger’s side more closely, eventually running my hand along the gasket that keeps the windshield in place. The gasket bunched up in a weird way on the passenger’s side. Was it misaligned? I poured a bottle of water over the windshield, then peaked back inside the van. The stream grew. I remembered the van’s previous owner telling me that the windshield had recently been replaced after a hail storm. Whoever had done it had botched the job.
I’ll have to figure out how to reseal the windshield. It’s a drag, but not nearly as much of a drag as it could have been. When I confirmed that the water damage was indeed the windshield gasket’s fault, I imagined I’d just been handed a fortune cookie. I broke the cookie, flattened the little slip of paper, and read aloud, “You will not spend this weekend replacing a heater core.” Amen.
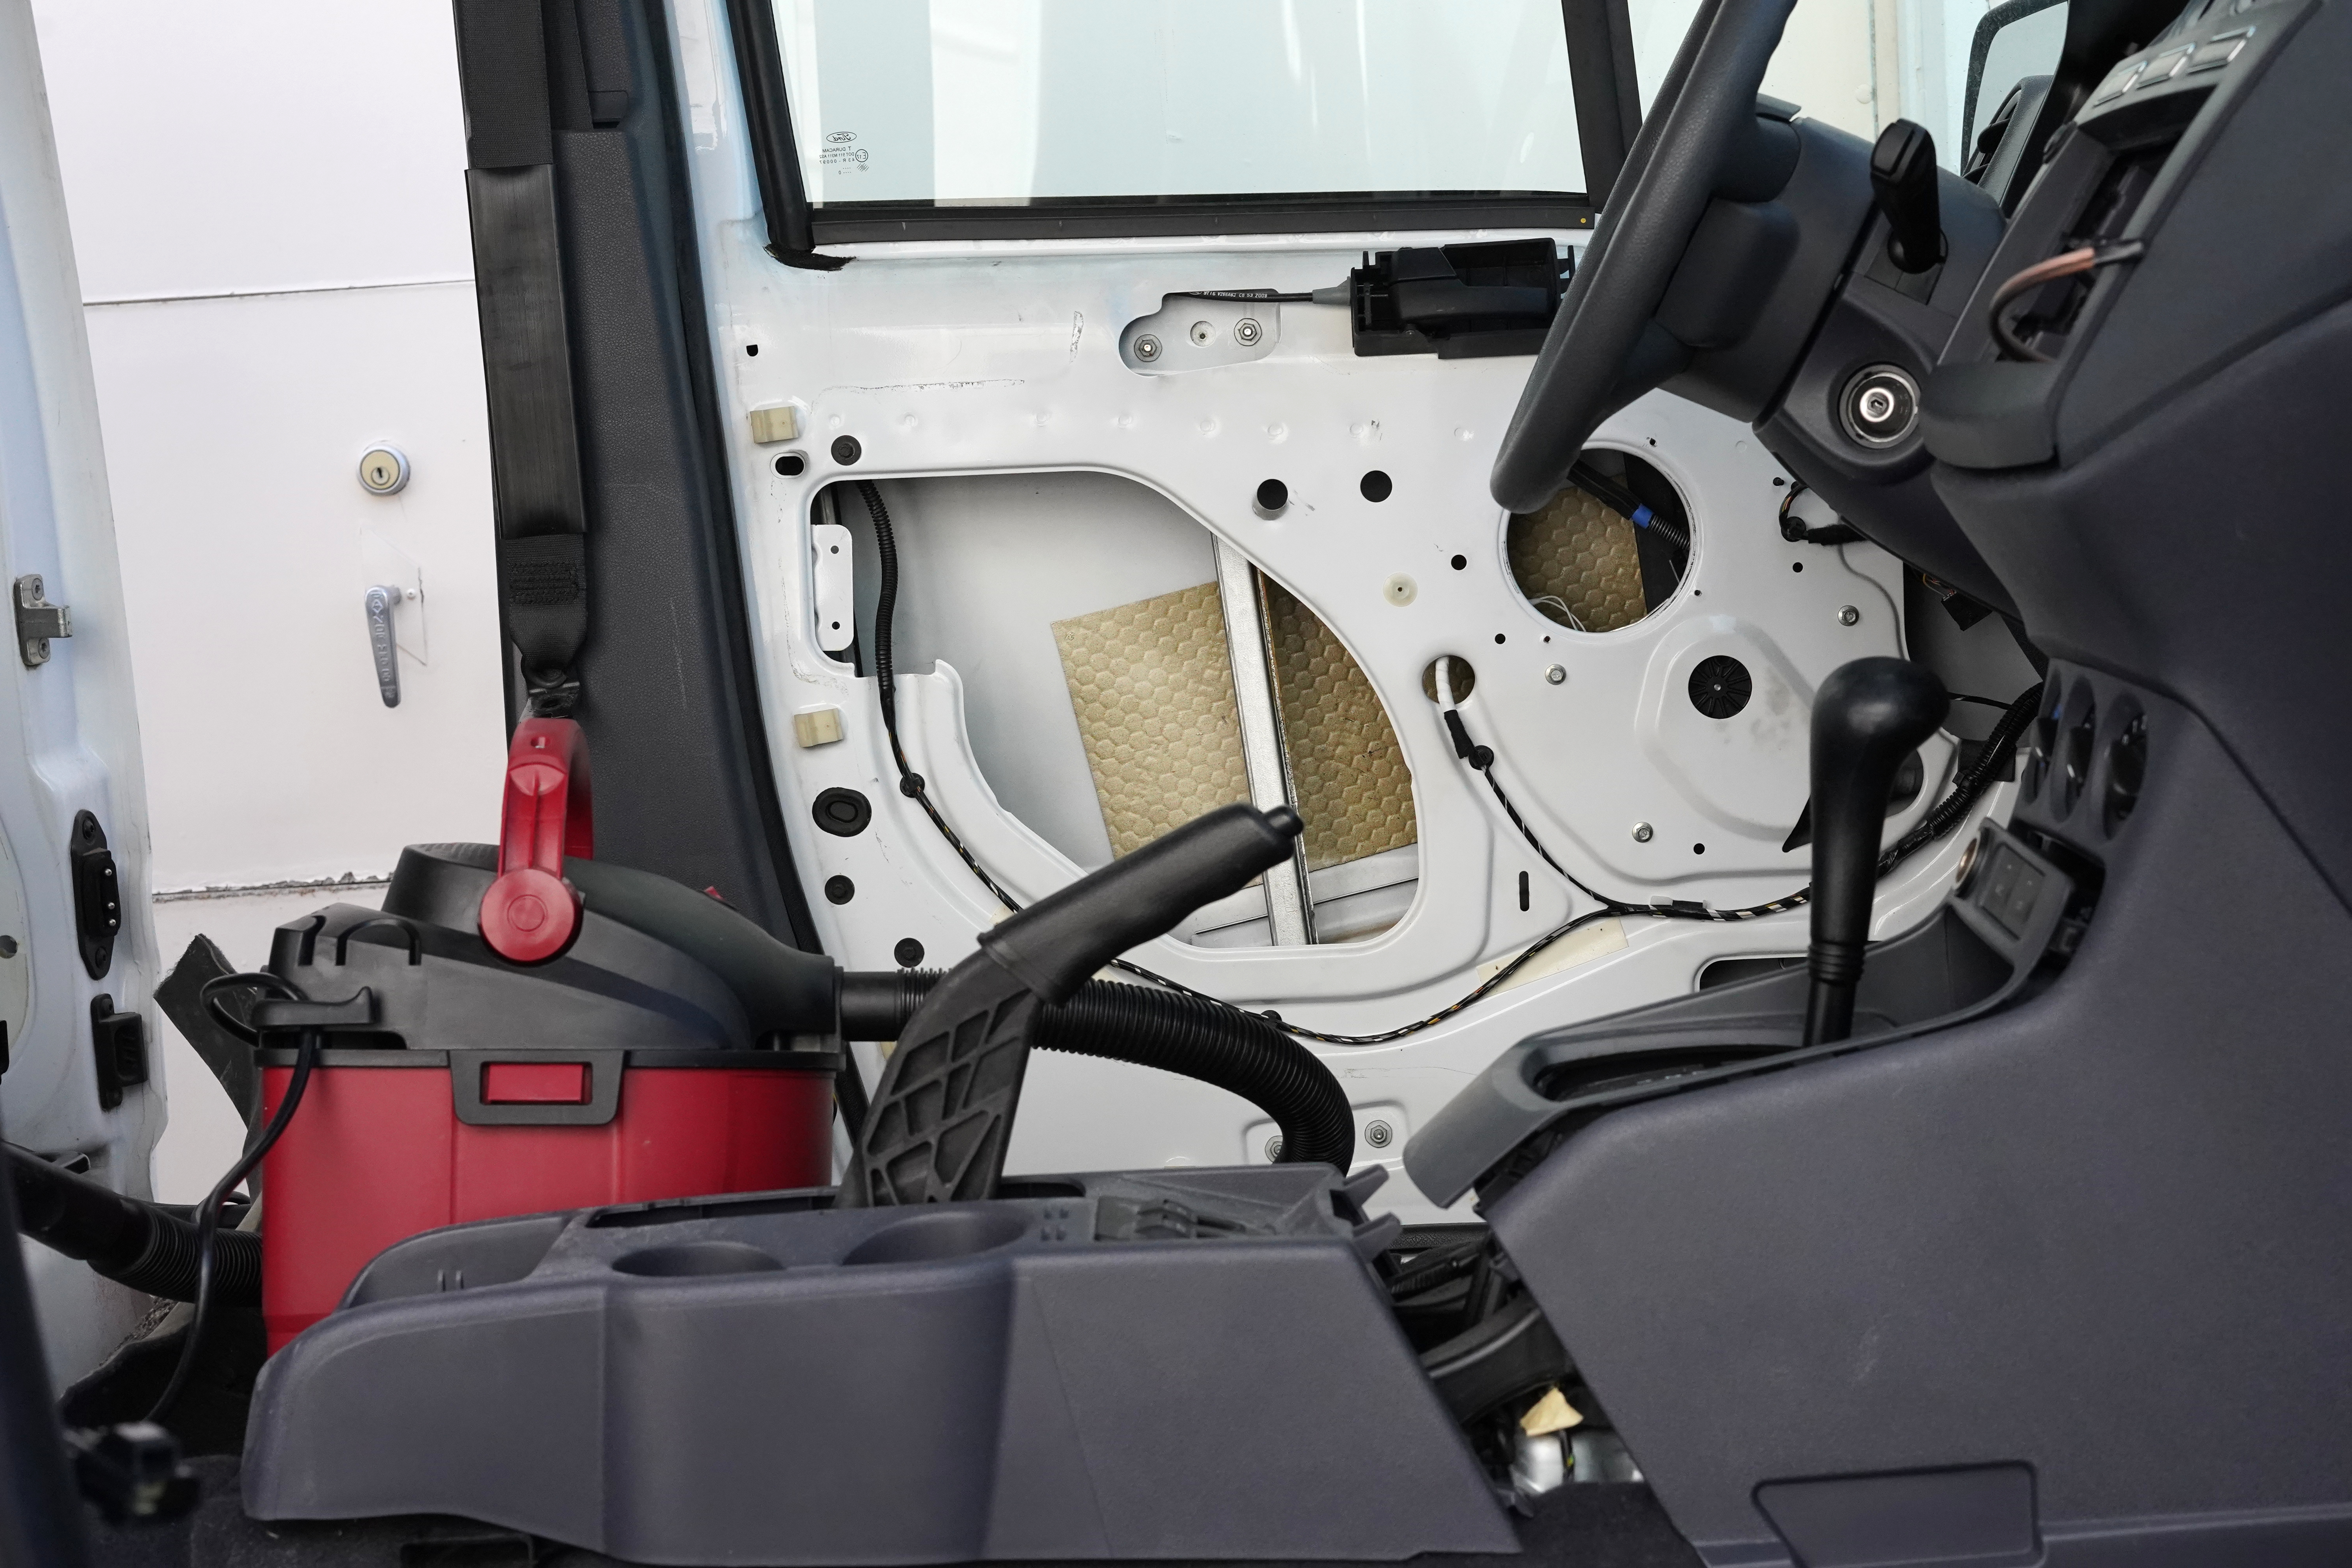
Problem #5: One of the window regulators is broken.
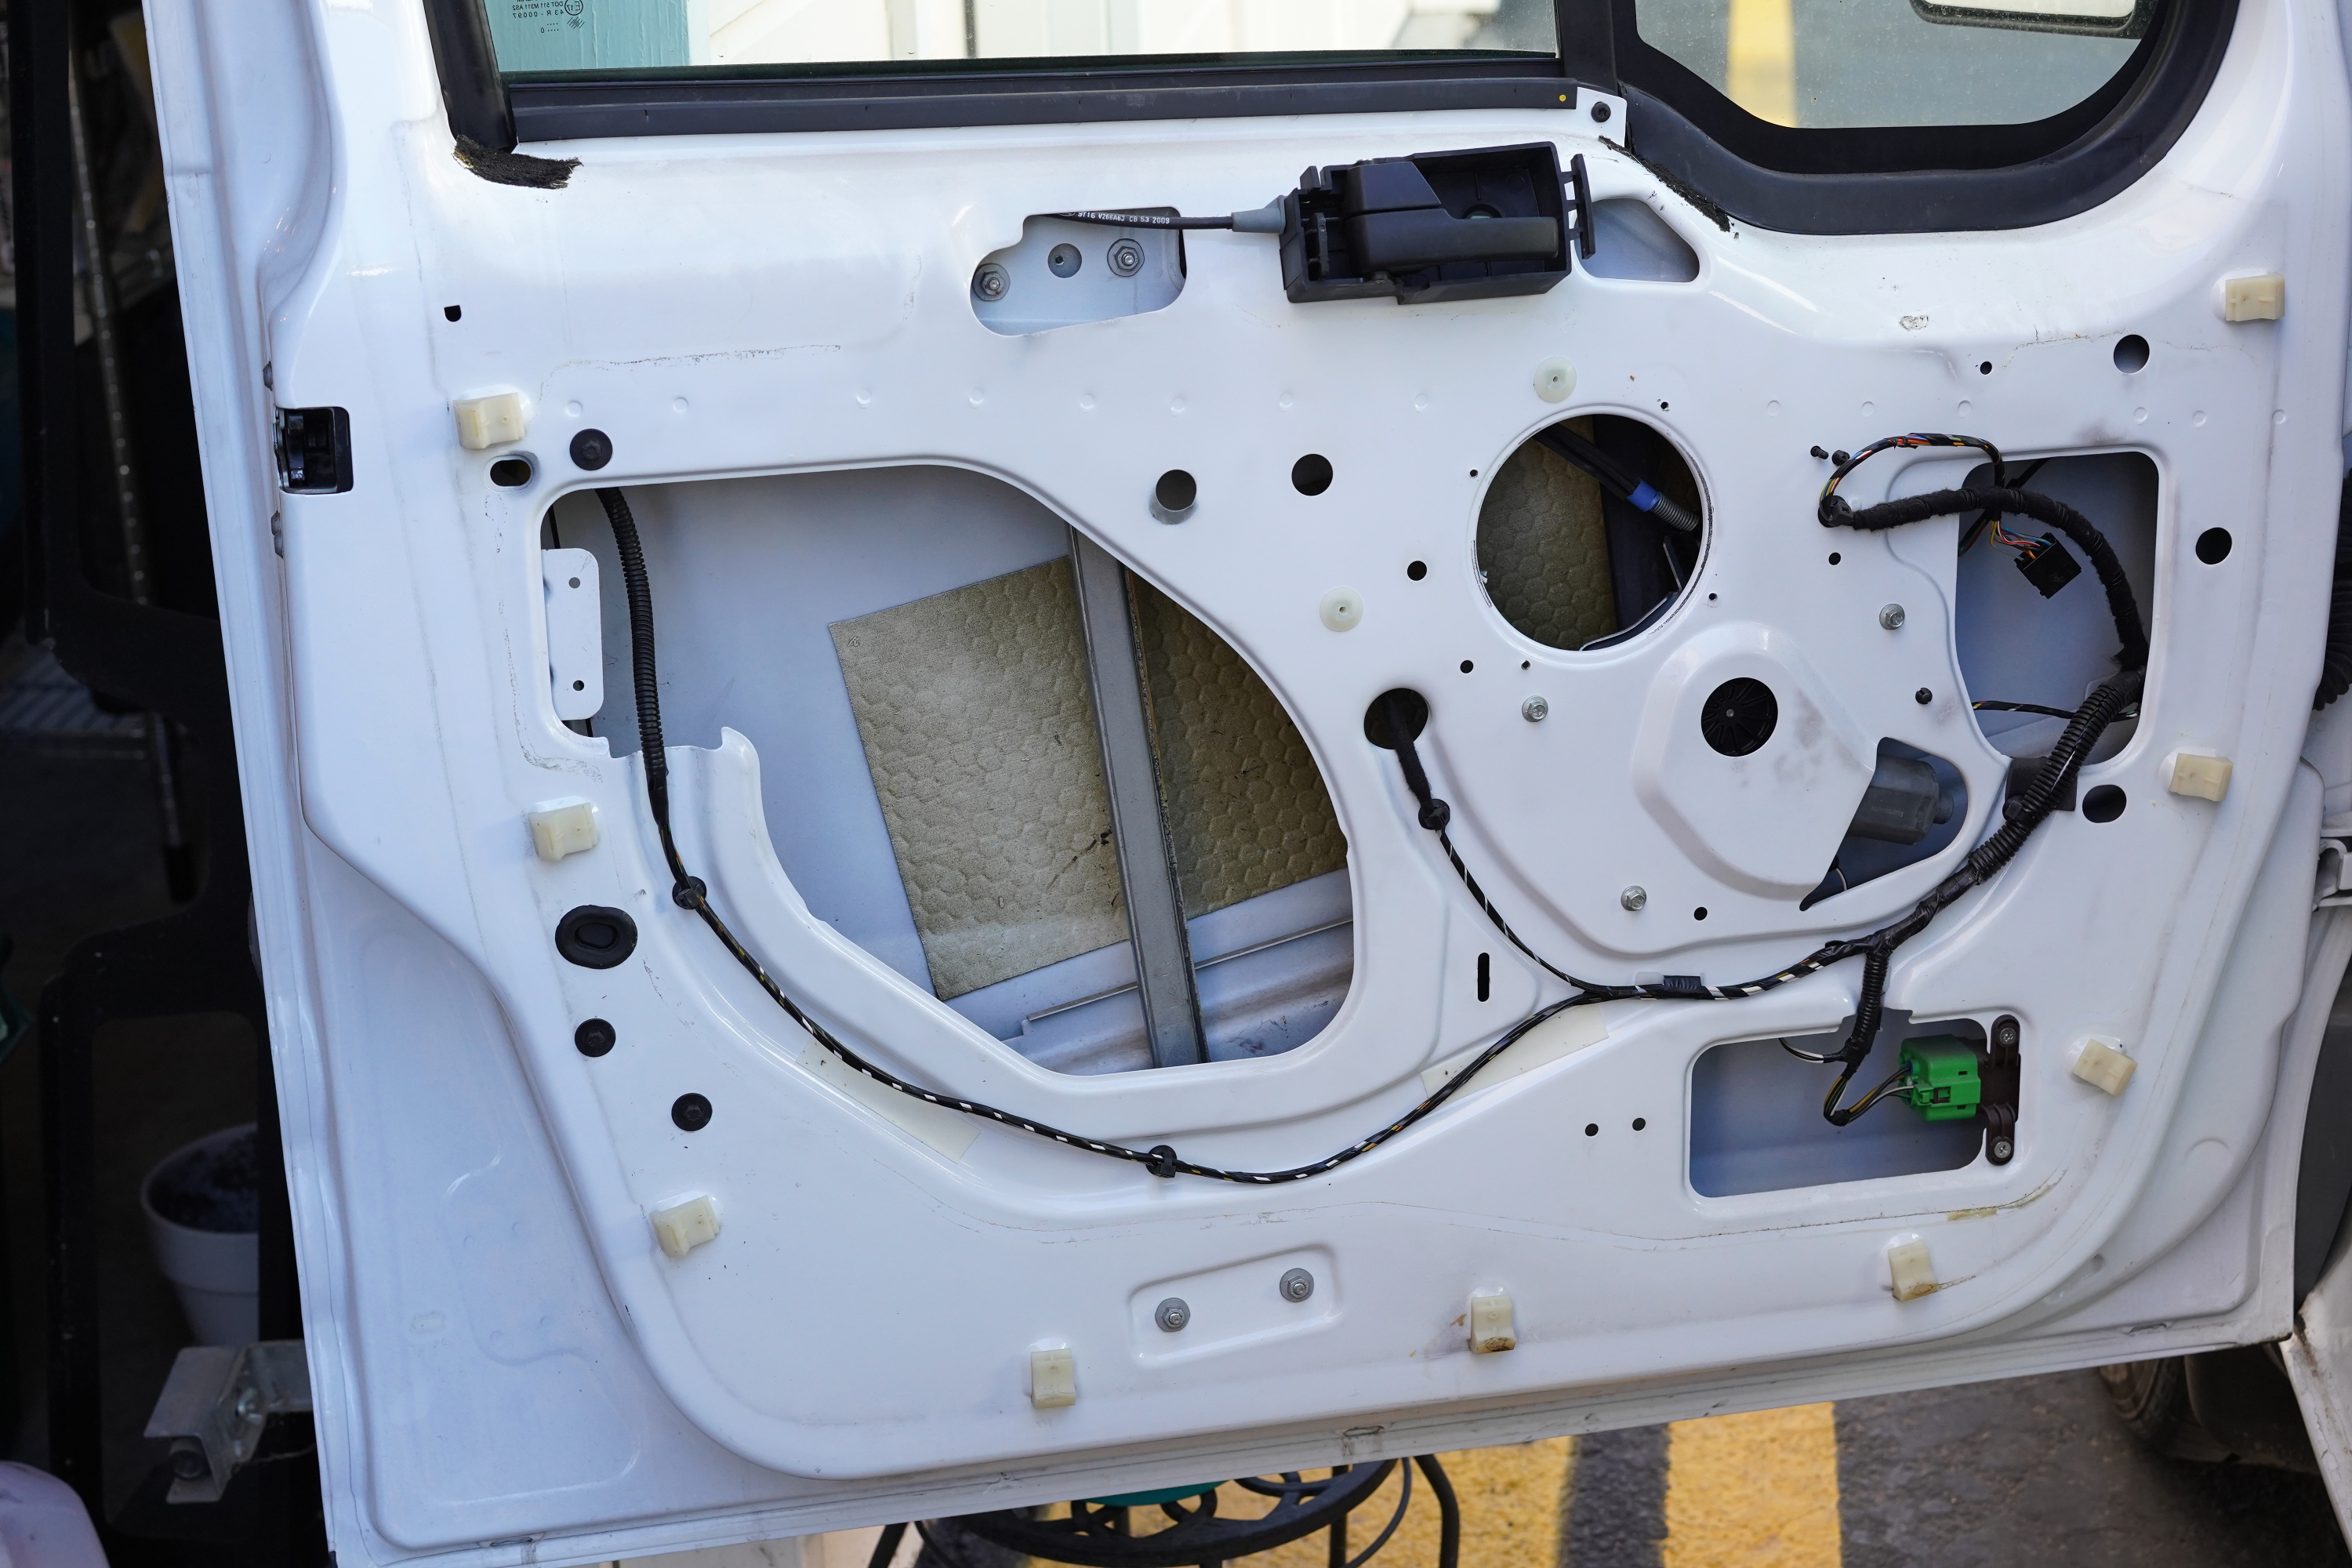
Months ago, while trying to fix the broken passenger power window, I took apart the passenger door. The inside of the door houses 1) the door handle system, 2) the power window system, including window regulator and motor, and 3) a stock speaker. I noticed the speaker was made out of cheap paper and decided to upgrade both front speakers.
Installing a new speaker on the passenger side was a piece of cake. I already had access to the guts of that door, and the new speaker fit nicely into its prescribed hole.
On the driver’s side, the installation turned out to be more complicated. I deconstructed the driver’s door, soldered the appropriate connectors to the existing speaker wires, and prepared to mount the speaker. Then I realized the speaker wasn’t going to fit in the hole because of a rigid cable that bisected the hole. I learned that this cable is part of the window regulator. I removed the regulator from the door and took a closer look.
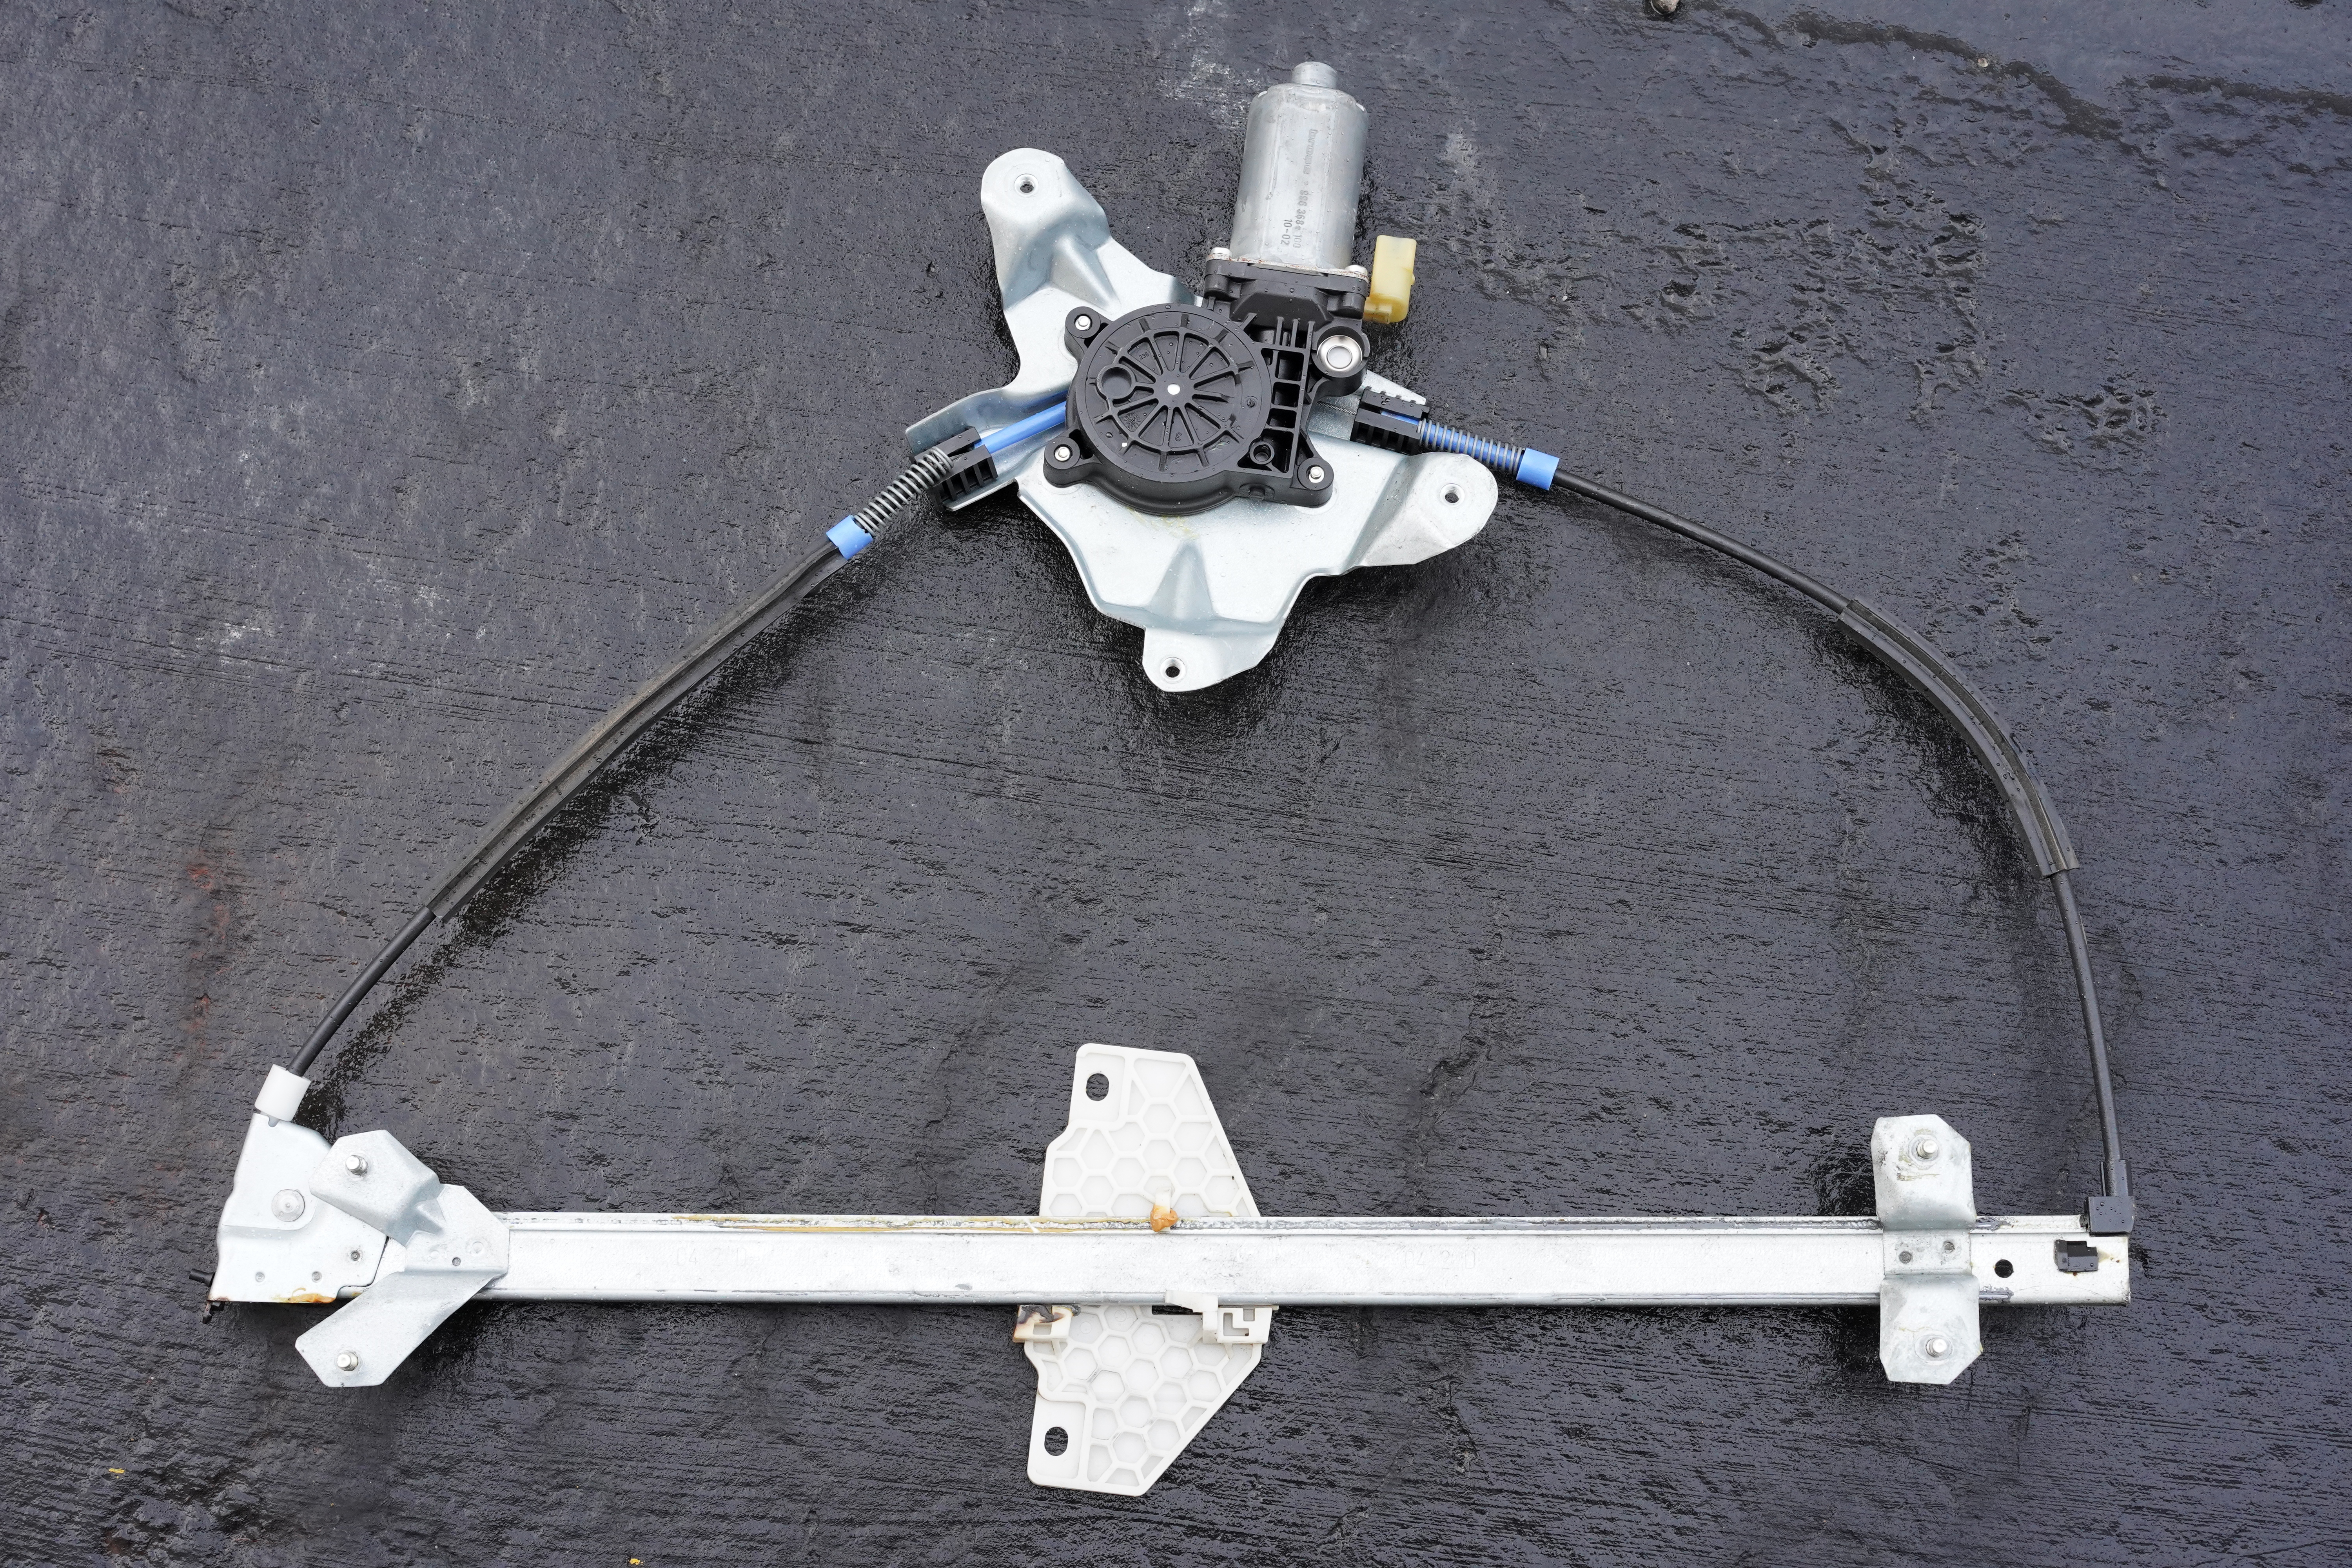
When I searched “how to fix a window regulator,” I came across many websites explaining how to remove the old regulator, trash the whole thing, and buy a new $85 regulator. This seemed crazy to me, because the only thing wrong with my regulator is a tiny blue plastic part, which is split. But you can’t just buy this little part at Auto Zone or a Ford dealership. Fortunately, a company in Turkey (where Transit Connects are built) sells parts like these, presumably straight from the factory. I bought a spare parts kit from Turkey for $18. The kit includes more parts than I think I need—cables and such—but at least it’s not a whole regulator.
It’s frustrating how most car parts are built with an expiration date in mind. Ford could have used metal in place of the blue plastic. Surely Ford’s engineers knew the plastic wouldn’t last. I wonder what their rational was—that using plastic would save a couple cents per car? That a broken window regulator would drum up business for their dealerships, which charge $250 for the fix?
Maybe Ford reasoned that a broken window regulator would force car owners to stop and reflect on their car’s advancing years. While waiting for the mechanic to bring his car around, the owner might begin to experience a certain vague, niggling feeling. Nothing important, just this sense that he is somehow behind. Behind whom? Behind what? The owner doesn’t have time to question; he lives a busy, full life that requires him to maintain a certain momentum to keep up with his various bills, feeds, and loved ones. He can’t invest any more of his time into this junker car. Later, over dinner, the owner might hear himself say that he’s been thinking about trading in the old Ford for a newer model. Isn’t it about time?
[…] the five problems? So far, I’ve solved four of […]